fbpx

What Is a Whole House Water Filter and How Does It Work?

Even though the water supply in Toronto meets certain standards of quality, any issue like a natural disaster, heavy rainfall, or a boil advisory can contaminate the water. In 2000, more than 2300 people in Ontario suffered from severe sickness because bacteria entered their water systems.
Therefore, to prevent contaminated water from entering the pipelines of your house, whole-house water filters are gaining popularity. But what is a whole house water filtration system, and what does it do? If you have the same questions, we are here to lead you to the right answers!
We will discuss what are whole-house water filters, how whole house filters work, and which type of filter is the most suitable for you.

What Is a Whole House Water Filtration System?

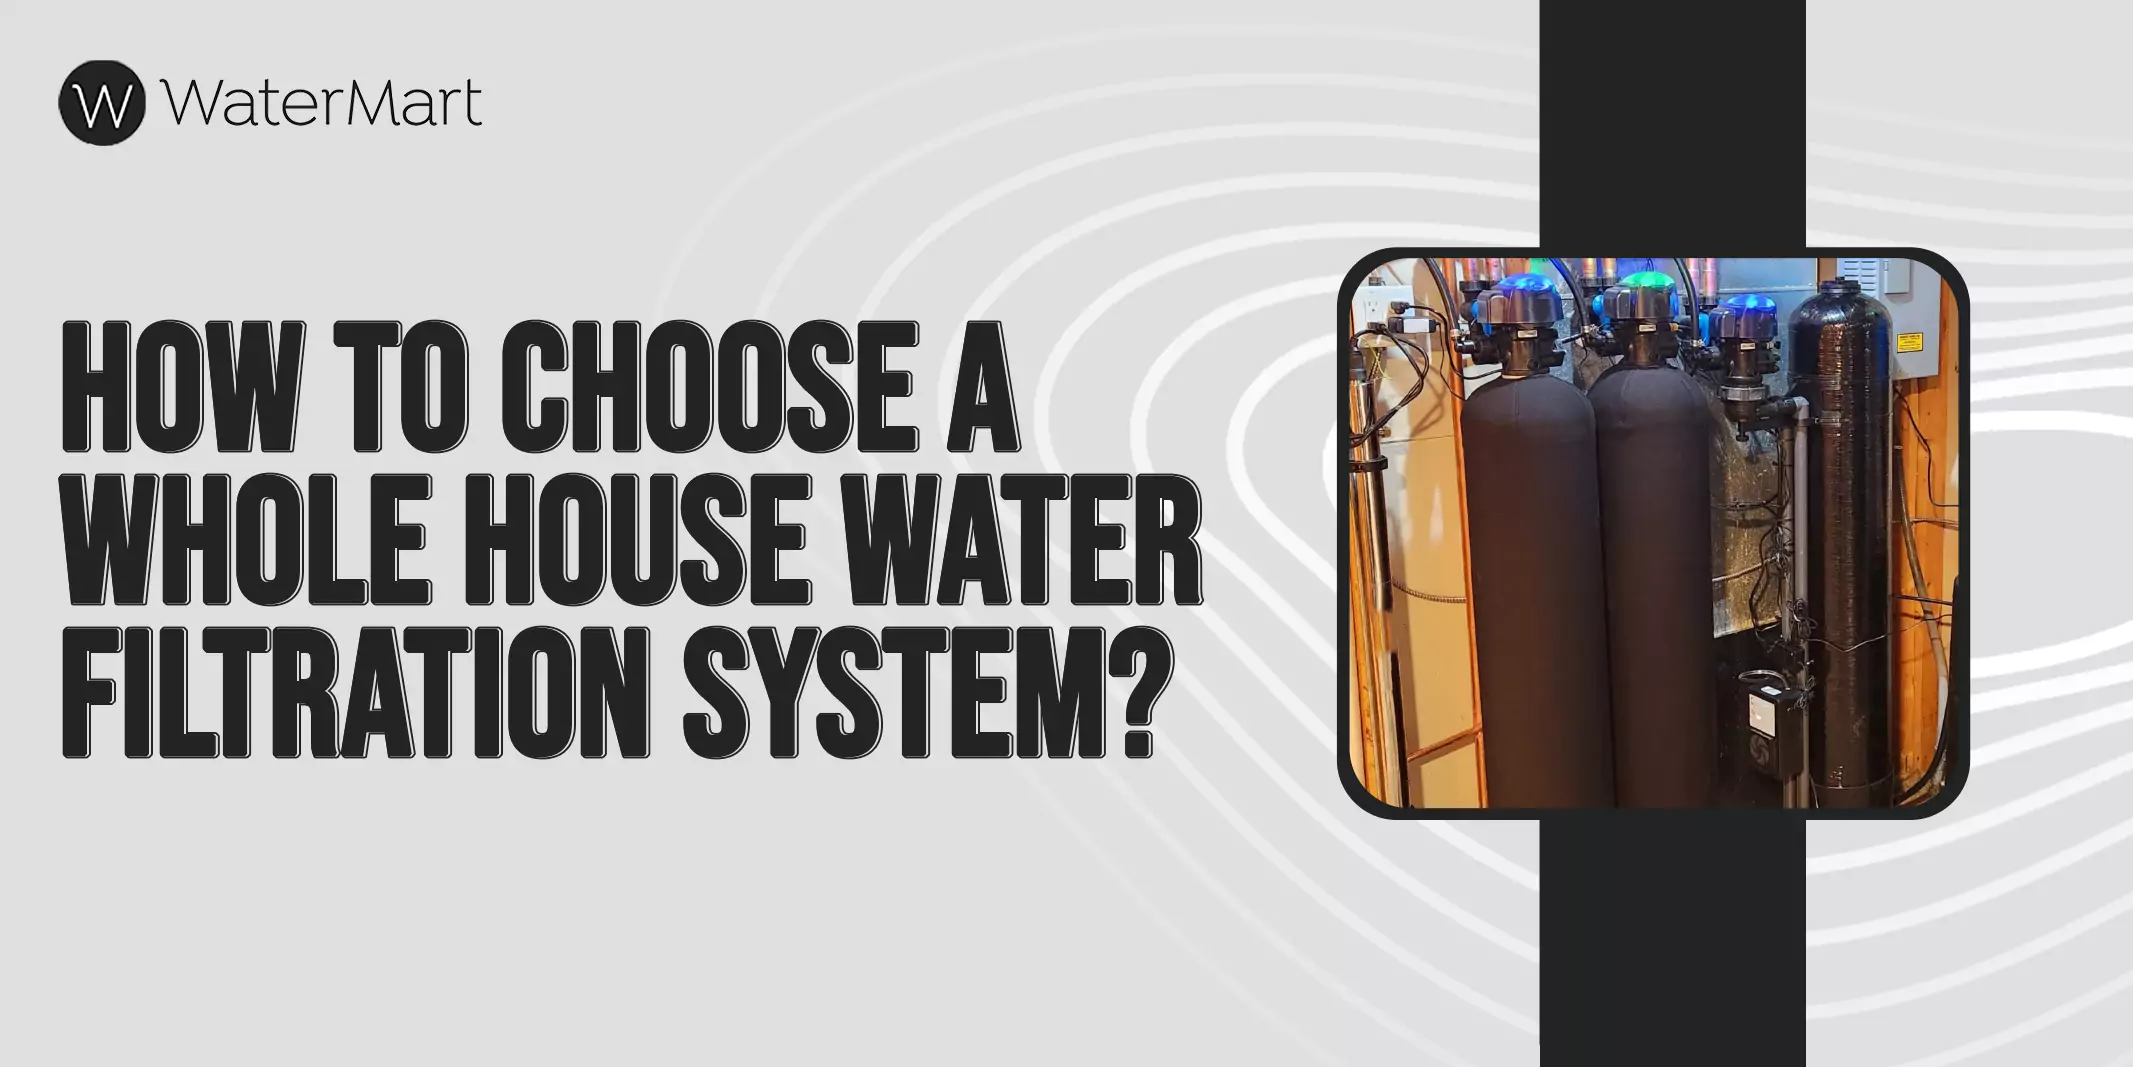
Whole house water filters, also commonly known as point-of-entry water filters, are installed at the main water pipeline and filter out the contaminated water before it enters your building. This means that the water flowing in every tap of your house or office is pure and free from any chemicals. This filtration system is not limited to purifying water at one specific point of use and that’s the best part about its functionality.
Many whole-house water filters are available in Toronto. They can be used to remove sediment, soften the water, filter out contaminants, or remove chlorine. We will now examine how these filters work to do their job efficiently.

How Does a Whole House Water Filter Work?

Water is treated at the main water plant for the presence of any chemicals. Sometimes, an excess of chlorine is added to the germs, which can be harmful as well. As the water flows through the pipes, several contaminants are mixed with it. Then it reaches your main water pipeline and enters your house.
A whole house water filter is used as an intervention at this entrance point and makes the water free of any impurities. With its installation, you will have safer and better-quality water for everything like cooking, drinking, washing, and showering. But how does it exactly filter water?

  • Sediment Filter:

This filter is also called the pre-filter. Simple whole-house filters contain this to remove dust particles and sediment mixed in the water. This filter has tiny pores that are too small to let any sediment pass through, and only the water can flow through them. Any particle larger in size than a blood cell (red) is trapped in this filter.

  • Chlorine Filter:

As we discussed above, water suppliers add chlorine purposely to make the water germ-free, but this is an unsafe element and should be eliminated from the water. Carbon filters are present to remove this excessive amount of chlorine.
The most common carbon filter used in whole house water filters is the Granular Activated Carbon filter. After the water flows through the sediment filter, it reaches the carbon filter. The filter is made up of carbon that has a very large surface area with many pores (crooks) on it that absorb water impurities, specifically chlorine.
Another type of chlorine filter is made up of a compound of copper-zinc but is not commonly used in whole house filters. The USA’s Environmental Protection Agency also recommends the use of carbon as chlorine filters.

  • UV Filter:

Some point-of-entry water filters have an additional UV filter that kills the living microbes in the water. In simple terms, it uses strong ultraviolet radiation to disorganize the DNA of the microorganisms so they are unable to reproduce.

  • Post Filter Stage:

After passing through all these stages, the water finally reaches the post filter stage. This is an enhancing stage as it ensures that all chemicals and sediment are removed from the water. It has mesh screens that trap any remaining harmful particles before letting the water travel to all the supply lines of your house.

  • Reverse Osmosis:

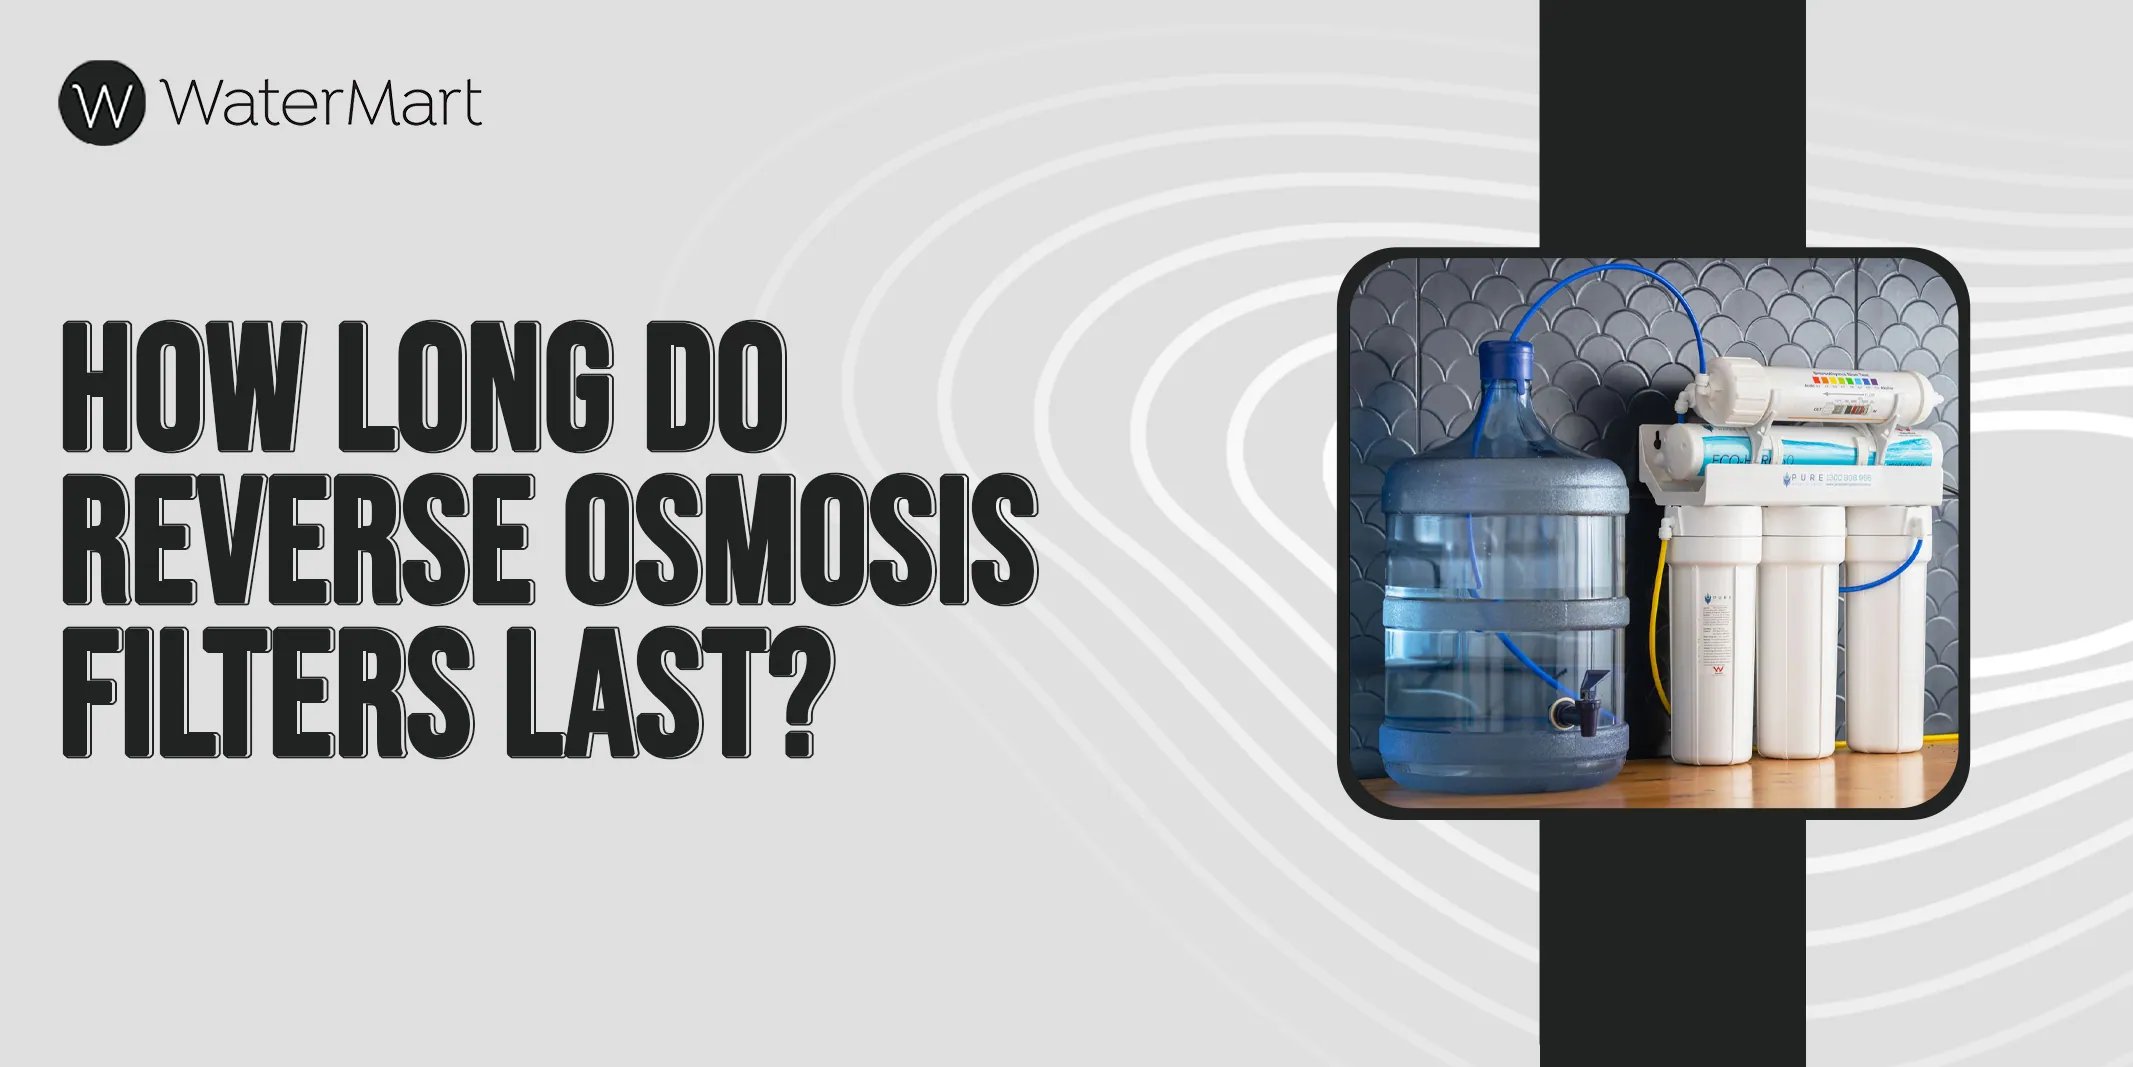
Reverse Osmosis is also a type of whole-house water filter that is widely used because of its efficiency in removing 99% contaminants. It has multiple filters like the sediment and chlorine filters mentioned above. First, the water goes through them and then reaches a semi-permeable membrane. This membrane has the tiniest pores (holes) that prevent small and large particles from flowing through.
The water that passes through these holes is pure and becomes known as a “permeate.” The leftover water containing these chemical particles is brine water, which goes through the drain line as waste water.

  • Water Softener

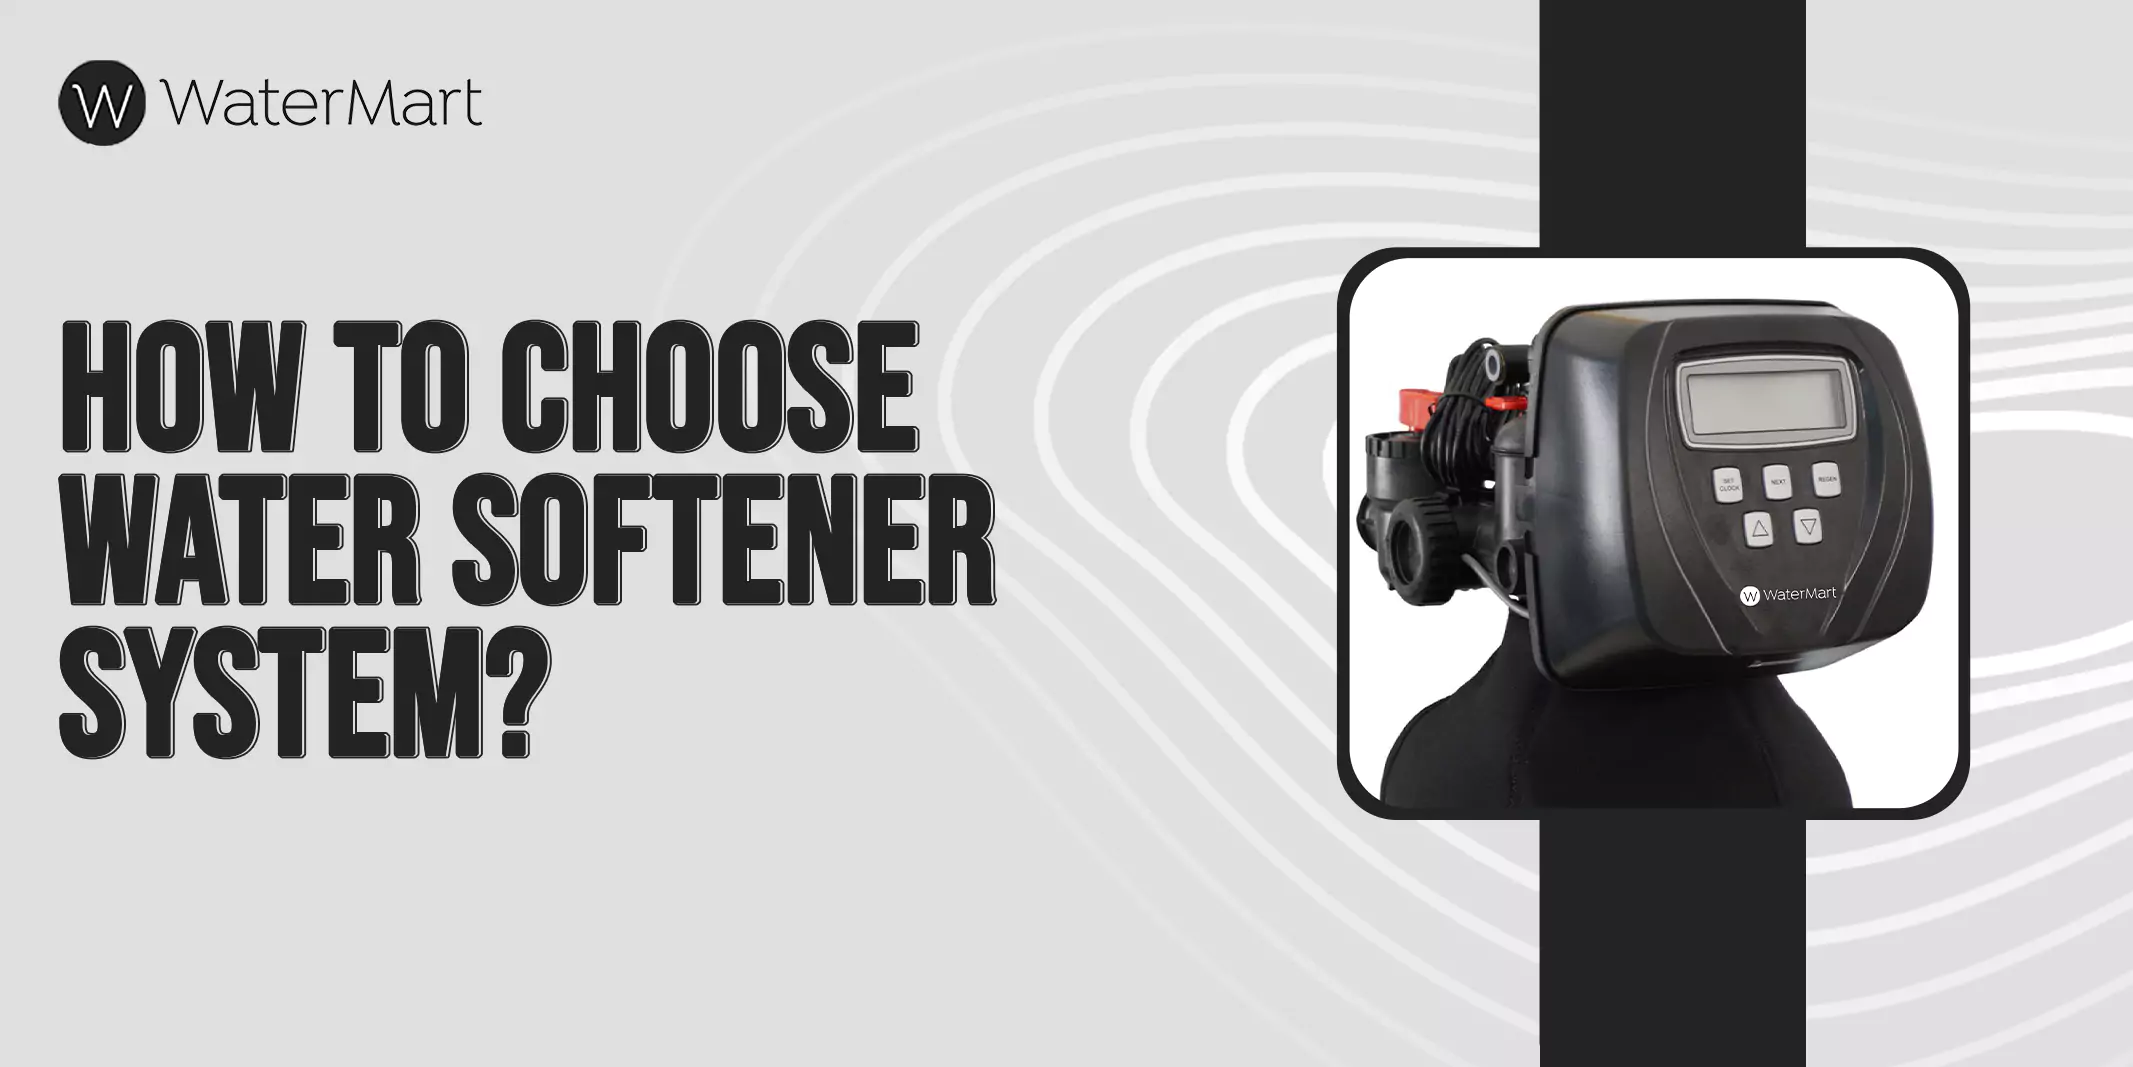
If you are installing a whole-house water softener, it works differently. It has a tank with resin beads in it that attract the charged hard particles of calcium and magnesium, and the remaining soft water flows into the pipes. Sometimes a salt tank is used to absorb particles from the resin to regenerate the process.

How Do I Choose the Best Whole-House Water Filter for My Home?

You need to consider factors like what chemicals your water contains, your budget, and the brand you are purchasing from. If your water has only been tested to be hard, you should buy a whole house water softener otherwise reverse osmosis or simple whole house water filters are a better choice. You should only invest in NSF-certified water systems manufactured by famous, reliable brands. It’s about the safety of the whole water supply of your house and should be given full thought.
You can blindly put your trust in us for your water filter systems. At Watermart, our whole-house filters are manufactured with sediment, lead, and activated carbon filters. We also provide whole-house water softeners for our customers. Every filter stage in the whole house water system is tested to produce potent results and to enhance the water quality. You can also book an installation when you make an order and we will complete the whole process very proficiently.

Whole House Water Filters – Our Final Words

Being the experts of water filtration systems, we are aware that with the growing population of Toronto, the need to buy water filters is also increasing. That’s why we suggest our customers invest in point-of-entry filters instead of point-of-use water filters. This way, they will have a continuous supply of pure, safer, and good-quality water in every corner of the house.
Additionally, filling the buckets or bottles from only one faucet will be no hassle. However, if you have a limited budget, small filter set-ups are also good to begin with.

FAQs About Whole House Water Filters

Do whole house water filters work?

Yes, they effectively filter out the entire water supply to your house. You can also rent a whole-house water filter to test its effectiveness before making a final purchase.

How long do whole house water filters last?

Whole house filters last several years but require consistent replacement of filter cartridges. It is best to check each filter after every 3 to 6 months.

Where should a whole house water filter be installed?

At the main water supply of your house. You can find it in the basement or crawlspace.

How much does a whole-house water filtration system cost?

It can cost anywhere between $800 and $5000, but the installation charges for most good-quality whole-house filters can reach $5000.

Is a whole house filter worth it?

It is worth your money because its multi-stage filtration process works efficiently to make the water pure and chemical-free before it enters your house.

Do I need a whole house water filter?

Yes, if your water was tested and contained chemicals and contaminants, the only reliable solution is installing a whole house water filtration system.

How Much Does A Reverse Osmosis System Cost?

With so many types of water filters available in Toronto, many consumers are confused about which is best for them. One such popular water filter is the reverse osmosis system. If you are also looking for a detailed guide about the reverse osmosis system cost, this one’s for you!
On average, smaller set-ups of reverse osmosis, like under-sink water filters, cost less, and large-scale set-ups, like whole house filters, cost more. The pricing range for a reverse osmosis system starts from $400 and goes up to $5000. We have discussed numerous factors that affect its costs, like the efficiency, installment charges, number of filters, its unique functioning, and benefits.
So, without further ado, let’s start reading and find out if reverse osmosis is worth your money or not.

Reverse Osmosis Cost Breakdown

To make the cost analysis of a reverse osmosis system easy, we have briefly described some elements that play a major role in its pricing Although It is a relatively expensive water filter because of its complex functionality and a few other factors, it will provide you with 100% guaranteed purified water.
But what are the main factors that add up to its total cost? Here’s a glance at them:

Water Testing

Before you purchase a reverse osmosis purification system, you need to get your water tested. You can purchase DIY water testing kits, which are available at cheap rates, or you can get your water tested at Watermart for free. All you have to do is fill out this form, and we will contact you soon. Otherwise, you can also contact any nearby local water experts, and they will help you analyze your water results.

Expert Installation

Another thing that adds up to the cost of reverse osmosis is its installation. The more skilled the technician, the higher he will charge. You can also install it yourself, but there can be chances of loose connections or leaks.
Get experts from Watermart who have detailed information about everything you want to know about the water system and its maintenance. We will provide you with experts at very reasonable charges.

Accessories

Accessories refer to the number of filters it has. Usually, it has a sediment filter and a chlorine filter with a membrane, but some brands add additional features. These make it more efficient and increase its cost. For instance, at Watermart, we have an extra filter in our reverse osmosis system that amplifies mineral content in the water. An additional faucet with the filter also costs extra.

Smart Technology

Some filters come with a smart app that can help you keep track of your water consumption and alert you for any filter replacements. Plus, you can also check contaminant levels and reduction of chemicals in your filtered water using the app. So, if you are buying a smart RO system, it is a bit expensive.

Third-Party Certifications

NSF (National Sanitation Foundation) certified RO systems have high costs because they are of better quality and have been tested to remove all contaminants, unlike a few cheaper ones that do not purify your water completely. That’s why it is better to invest in third-party certified RO systems since they are reliable.

Long Filter Life

If you are investing a handsome amount of money, you should purchase one with greater longevity. At Watermart, our filters and their membranes and cartridges work for a long period very effectively. Therefore, you should look for brands that offer a long filter life.

Design

Buying a cheaper RO system means it will have a typical design and will be a bit more difficult to use. It will also not have multiple and efficient filters. On the contrary, a more expensive reverse osmosis has an ideal size, is easy to use and install, and works more effectively.

Maintenance and Repairs

The cost of filter maintenance and replacement can reach $250 annually. The membranes in the RO system also drain away sufficient waste water, causing high water bills.

Satisfaction Guarantees

Some brands also offer money-back guarantees that ensure a full refund in case your RO system does not meet your needs. Although it is not an issue, choosing an RO system with a satisfaction guarantee is a risk-free investment.

Payment Options

A lot of payment options also help you manage your money. If you do not have an adequate amount of money at the moment, you can opt for brands that provide installment options. Some also offer RO systems on rent. You can choose from different payment options as well as a few banking methods may also provide you with discounts.

What Makes Reverse Osmosis Filtration Unique?

Reverse osmosis takes a different approach than most filters to remove the contaminants from the water and this is what makes it unique. It makes use of a filter with tiny pores instead of any separate material. We will be briefly discussing below how it functions amazingly to filter out harmful particles. You will also find out if you must have one in your house or not.

How Does Reverse Osmosis Work?

A reverse osmosis water system consists of a main water tank connected to a multi-stage filtration process. The main component of this system is its semi-permeable membrane, which pushes water into it through pressure.

Due to the holes in the membrane, all the contaminants are separated from the water and a permeate(pure water) is produced that flows through your pipes. Since it works uniquely and proficiently, it is becoming very widely known, but does everyone really need an RO system?

Does Everyone Need Reverse Osmosis?

The straight-up answer to this is: YES! Even though all water suppliers in Toronto guarantee that their water plants only generate pure water, the municipal committee warns that due to the high population in this city, it is obvious that chemicals get mixed in the water before it reaches your house.
Therefore, to avoid the potential risks of impure water, installing a good water filter like reverse osmosis has now become necessary.

When to Consider Reverse Osmosis?

Here are a few times when you should consider a Reverse Osmosis:

  • A water expert tested your water and reported that it was contaminated. In this case, the water experts usually suggest buying a water filter that removes all contaminants. Reverse osmosis is a good option because it removes around 99% of all the contaminants, making your water clean.
  • Most people have a simple water filter installed, like a countertop filter, which is not very effective for large amounts of water purification. If you also want to upgrade your old, outdated filter system, it is time to consider a reverse osmosis filter. It has a comprehensive filtration process and uses its advanced methods to filter out germs and provide better quality water.
  • Switching to reverse osmosis is a sensible option, especially if your water has been tested for VOCs (Volatile Organic Compounds). RO systems are best for removing such compounds and other microscopic bacteria.
  • Moreover, if you are wasting a lot of money on bottled water, you can purchase an RO system and save money with a one-time investment. It will also save you the extra cost of gas bills, as you will not have to boil water frequently anymore.

Choose the Right Reverse Osmosis System for Your Home

As we have already discussed, you can use the reverse osmosis system for two types of water filter set-ups: one-location water systems or whole-house water filtration systems. Which one is the best for you depends on your budget and your needs.
If you want purified water running in every tap of your house and have a high budget, you should go for whole-house reverse osmosis filters. Otherwise, if you are looking to purify water in one area of your house only, you can buy a small reverse osmosis system.

Should You DIY vs. Professional Reverse Osmosis System Installation?

The answer to this depends on the type of reverse osmosis system you are planning to install. You can easily DIY with the right basic tools if you have purchased a small system.
However, if you want to install a whole house reverse osmosis water filter, we prefer to hire installation experts for that. That’s because installing a filter to the main water line needs high plumbing skills, and one little mistake can damage the whole system, causing your money to go in vain.
At Watermart, we have installation experts who have been highly trained to install filter systems accurately and carefully. With our services, you can blindly trust the installation process. Whether you want an installation for your house or any commercial building, you can contact us now to book an installation.

What Are the Benefits of RO Systems?

The best part about installing RO systems is that they will provide pure drinking water that tastes, smells, and feels better. If the water test results show the presence of contaminants in the water, the RO system is a good choice. Here are some benefits it offers for its price:

Reduced Contaminants

It does not only remove large chemicals and bacteria but also the tiniest microscopic germs as well. This is due to the presence of tiny pores in its semi-permeable membrane that separate the smallest bacteria from the water. The water that is left is called the permeate and is free of any contaminants. The RO systems remove 99% of the contaminants and chemical compounds like

  • Lead
  • Chlorine
  • Fluoride
  • Inorganic Compounds
  • Pesticides
  • Volatile Organic Compounds
  • Aluminium
  • Pharmaceuticals

Less Sediment

It also separates sediment and dust particles from the water. All the large particles are filtered out and added to the brine water (wastewater), which is drained away through the drain lines.
The removal of all the contaminants and sediment makes the water pure, clean, healthy, and safe to drink and use.

Energy Efficient

Good quality water makes the appliances and machines that use water more efficient and increases their long life. RO water systems are also compatible with other water systems like a water softener if you have one already installed in your house. Although RO systems use up a lot of energy, they are quite energy efficient at times.

Conclusion

We hope that we provided you with every information you needed regarding the budgeting of a reverse osmosis filter setup. The reverse osmosis system price depends on many factors we discussed and choosing the right one that is affordable for you is in your hands.
We suggest our customers purchase a reverse osmosis water filter because it is reliable, works longer, and provides a consistent supply of pure water to your house for drinking, washing, cooking, and showering.
If you are looking for a trusted brand, Watermart can be the best choice. As one of the top water filter suppliers in Toronto, we manufacture our water filters with multiple filtration processes that produce pure drinking water for everyone! Our filters are highly reasonable, scientifically tested, and have an energy-efficient membrane.

FAQs

Is it worth getting a reverse osmosis system?

Yes, it is worth investing in a reverse osmosis system if you have a sufficient budget because they are more efficient than other filters in filtering and purifying dirty water.

Is reverse osmosis water safe to drink every day?

Yes, RO systems drain away the waste water and only let pure water flow through your taps, so it is safe to drink all the time. However, replacing filters every 6 months is a good practice.

Does reverse osmosis really purify water?

Reverse osmosis is known to remove 99% of contaminants from the water, so it purifies your water from all chemicals, contaminants, sediment, and bacteria.

How much does a gallon of reverse osmosis water cost?

On average, a gallon of reverse osmosis water ranges between $0.50 to $2.00.

How much does a reverse osmosis system cost to maintain and operate?

The maintenance and replacement of reverse osmosis filters cost between $100 and $250 annually.

What’s better, a whole house reverse osmosis system or a point-of-use system?

It depends on your budget and requirements. A whole-house reverse osmosis system costs more but is effective because it filters out the whole water supply to your building.

How Much Does A Home Water Filtration System Cost?

Many people in Toronto are buying water filtration systems for their houses. With the increasing demand for water filters in the market, their prices are also rising. Many of our customers enquire about the cost of the water filtration system.
To make it even easier for you to select the right water filter that matches your budget, we have discussed all the factors that should be considered and also listed down the types of water filters available. By the end, you will be enlightened about the cost of water filters in detail and make the right choice for yourself.

Determining The Cost of Water Filtration System

Numerous factors influence the cost of a water purification system. These include the brand, the efficiency and capacity of the filter, and the labor charges. In this section, we will examine how these factors affect the pricing of any system. So, let’s see how you can prevent extra spending and save some money for yourself!

Brand

The better the brand, the higher the price. If you buy from a top brand in Toronto, they will automatically charge you more because they are committed to using expensive, top-quality tools and parts. At Watermart, however, we offer the best water filters at reasonable prices.

Capability & Capacity

The filter tanks that hold the water can be of varying sizes. This also plays a major role in the cost of water filters because a larger tank takes up more material and thus costs more. Additionally, not all filters have enough features, so if you choose a filter that’s more capable of water purification, like a whole-house water filter, it is comparatively more pricey.

Labor/Installation

Installing the filter yourself is easier and cheaper. On the other hand, if you have bought a complex water system like a water softener or whole-house water filter and are hiring an installation expert, it will cost around $200 to $600 extra, depending upon the level of their expertise.

Types of Filters

Filtration systems with simple filters like carbon and sediment filters cost less ($800 to $1500). However, if they have additional features, like a UV light filter, they are relatively expensive and can cost up to $3000.

Replacement of Filters

All filters require regular maintenance and replacement of the filter cartridges. Replacement charges range from $40 and sometimes go to $100 if there is a major issue in your water filtration system.
In addition to these factors, the cost of a home water filtration system also depends on the type of water filter you buy.
Here is a summarised pricing of the filter systems for all of the buyers:

Filter SystemsAverage Cost
Whole-house water filtration system$800 to $5000
Under-sink water filters$400 to $700
Well-water filtration systems$800 to $4500
Simple filters$100 to $500

Top Water Filtration System Types

There are three main types of water filtration system types. If you need to purify the whole water supply to your house, then you are definitely looking for a whole-house water filter.
However, if you want to filter water in one specific area, you can purchase small filter set-ups like a reverse osmosis water filter, which is a type of under-sink water filter. We have briefly described the prices of each filter system below.

Reverse Osmosis Drinking Water Filtration

If you are installing a reverse osmosis filtration system as an under-sink filter, it costs between $400 to $700. There is also a whole-house reverse osmosis filter, which costs more. Reverse osmosis uses a semi-permeable membrane to purify water and remove 99% of contaminants. But it has a major drawback of wasting too much water as brine (impure water).

Whole House Water Filtration

Whole-house water filters are the most effective and complex systems because they filter the full water supply to your house. The whole house filtration system cost starts from $850 and goes up to 3000 if it has any UV filter or extra features.
UV filters use solar energy to destroy chemicals. The cost of a whole-house filtration system also depends on the size of the house and the filters in it. A bigger house will require a large whole-house filter set-up, which will be very expensive.

Simple Filtration

Simple filters are the cheapest and have prices between $100 to $500. They are good for you if you have a low budget and are not looking for a multi-stage filtration of your water.

Signs You Need a Water Filtration System

You should only invest in a water filter when you really need one because even though it has its advantages, it costs a handful of money. There are some signs that can help you figure out if you should install a water filter or not. We have discussed them briefly so you can see if you have observed any such symptoms.

You Notice Unpleasant Odors

If your water smells unpleasant, it means some bacteria is building up in it or maybe some dirty water mixed with it. In any case, foul-smelling water is harmful to one’s health and should be filtered before use.

You Taste Something Strange

If your water tastes unusual and strange while drinking, you should immediately stop using it. Bad taste usually means your water has an excessive amount of chlorine or hydrogen sulfide and should be treated as soon as possible. If your water tastes and smells the same, you can observe its color.

Your Tap Water Doesn’t Look Clean

You should notice the color of the water running in the tap. If it seems brownish or dull in color, it is time to buy a water purifier because unclean tap water is a sign that some chemicals are dissolved in it.

Your Area Had a Recent Boil Advisory

Sometimes, contaminants attack the main water system that supplies water to the whole area. In this case, the water inspector issues boil water notices to warn residents about the polluted water. If your area encounters a boil advisory, you will need to buy a water filter.

Your Water Test Came Back With Concerning Results

The best way is to get your water tested. You can also schedule a water test at Watermart by filling out this form. We will provide you with the water results very soon and you can also enquire at our customer service to discuss whether the results show a need for a water filter or not.

You Notice Other Issues

Other symptoms include damaged hair or skin, dirty spots when washing dishes and clothes, and lower water pressure than usual.
In any case, you should get a water filter installed for a safe and healthy water supply.

What Benefits Do Water Filters Bring?

You must be wondering why water filters are becoming a necessity in Toronto. Well, It’s simply because they have various benefits proving them worth their price. From making your water free of chemicals to enhancing the quality of water flowing through your taps, water purification installation is a fruitful investment. Here are more benefits of water filters:

Enhanced Quality & Taste

Of course, water that is pure of chemicals, pesticides, harmful compounds, and solids tastes and feels better than impure water. You will feel good while drinking filtered water because it is safe and healthy.

Drink More / Waste Less

With better quality, your will to drink more increases, and you remain hydrated more often than before. It also saves the wastage of bottled water.

Improved Energy Efficiency

With filtered water, all the machines can work to their fullest, thus improving their systems’ efficiency. Chemicals in the water usually make machines inefficient.

Extended Lifespan of Home Appliances

Many home appliances erode because of bad water containing strong chemicals. This causes the machine to deteriorate quicker than its guaranteed life. Pure and filtered water elevates the lifespan of all home appliances that use water, such as washing machines and dishwashers.

Easier Cleaning

After washing your dishes and clothes, you will not witness any water spots or dirty stains. Hard water is the main reason for improper cleaning, so making it softer and purer encourages easier and enhanced cleaning.

Experience Softer Skin & Hair

All beauty experts say good water is the secret to softer skin and hair, and well water (with an abundance of chemicals) can damage your hair and also give rise to different skin issues. That’s why a water filter will provide you with good-quality water for your hair and skin.

Water Filter Systems – A Worthy Investment Or Not?

In our opinion, installing a water filter system in your house is beneficial for you and your family. It will reduce any risks of contaminated water and provide you with only pure, tastier, healthier, and good-quality water that is safe for your household.
If you have a high budget, you can purchase a whole-house water filter, but if you have a low budget, you can just install an under-sink water filter that is smaller and easier to install as well. We have top-quality water filters with an extra layer of safety and exceptional prices, so you can put your trust in us and make a purchase now! At Watermart, we also have experts who will make the installation process easier and faster for you.

FAQs

Are whole-house water filters worth it?

Yes, they are worth your money because whole-house filters provide pure water in every tap of your house, preventing the spread of any diseases.

Do you need a water filter in Toronto?

Water coming from the plants in Toronto is often safe to use and drink. However, it is better to get your water tested in case any chemicals get mixed in it. You can contact us to book a water test.

Where should a whole-house water filter be installed?

It should be installed in the main water supply lines, which can be found in your basement or crawlspace.

Who installs water filtration systems?

Using the right tools, you can install them by yourself but if you want an expert installation, you can hire professionals from Watermart.

What is Water Softener System & How Does it Work?

The hardness of Toronto’s water is one of the major issues Canadians face, and finding a good, long-term, and reliable water-softening system has become a major difficulty. If you can relate to this, you are in the right place.
Our company has a long history of dealing with water hardness problems in Canadian homes, and we can confidently say that you will never have to deal with this problem again.

The Basics of Water Softening

The presence of minerals magnesium and Calcium is termed the hardness of water. And no, it is not beneficial, though it may sound so.

The hardness of Toronto’s water largely causes increased maintenance needs and costs in plumbing systems. This leads to scale buildup in pipes and fixtures. Fortunately, water softening is the best way to remove the minerals (mostly magnesium and calcium) that cause hardness in water.

The attraction of these positively charged ions to negative ones lays the basis of a water-softening system. When brine (salt water that has negatively charged ions) is introduced to these minerals, the resulting reaction gives us soft water. This water is now safe for use and does not cause scaling in the plumbing system.

Water Softeners: How Do They Work?

Sodium chloride, potassium chloride, rock salt, and other salts serve as some of the easiest and most common water softeners. This is because salt happens to have highly reactive and negatively charged ions, which are efficient in reacting with Calcium and Magnesium. Resin beads coated in sodium are introduced to the tank of hard water.
The negatively charged ions of sodium attract the positively charged ones of magnesium and calcium, hence resulting in the covering of the resin beads in these minerals. Regular maintenance demands regeneration when resin beads are fully covered. The resin beads are cleaned so that softening can continue.

Water Softener vs. Water Conditioner vs. Water Filtration System

Although water softeners, conditioners, and filtration systems have similar names that can easily be confused, they are all designed to improve the quality of water.

Water Softener

A water softener has one main purpose: to remove the hardness in water. Calcium and magnesium are removed through an ion exchange process with our sodium-based water softeners. As a result, the improved quality of water reduces scale buildup, better lathering, and less soap scum.

Water Conditioner

A wider term, water conditioner treats more than just hard water. At WaterMart, we understand that iron, manganese, and hydrogen sulfide are also decreasing the quality of water. A water conditioner uses several other methods than resin beads, such as oxidation, filtration, and catalytic media to clean water.

Water Filtration System

A water filtration system is both a physical and chemical barrier that removes impurities like sediment, bacteria, chlorine, and other harmful substances like heavy metals. Installation of WaterMart’s highly praised water filter systems can keep away water-based diseases from your household and improve your health.

The Perks of WaterMart’s Softeners

Toronto’s hard water supply does more than just make your house difficult to clean. It also destroys hair and skin health. A water-softening system puts to rest a lot of your worries and allows house cleaning to be easier. A Water softener treats not just this, but so much more:

Effectively Soften Water

A high-quality water softener from Watermart can effectively solve all water hardness problems. Our products are designed to banish all hard water worries once and for all. The Calcium and magnesium ions will be gone from the water with a simple brine solution.

Protect Appliances

Appliances like dishwashers, washing machines, water heaters, etc. are prone to corrosion and reduced efficiency because of hard water. The buildup in pipes also reduces water flow due to scale buildup. Water softening rids away with most of these problems.

Enhance Cleaning

Have you noticed the scum residue on your fixtures and even utensils? Water softening can get rid of most of your scrubbing and cleaning since soft water does not cause scale buildup and makes it easier to clean and maintain fixtures in the house.

Last Over a Decade

A high-quality water softener from WaterMart can last up to a decade. Our systems are reliable, and our speedy customer support makes the whole process easier and more efficient. Our easy-to-maintain system has made many customers happy.

Common Water Softening Issues:

The hardness of water has its negative impacts, but water softening comes with a few hurdles too. Of course, the introduction of a new mineral/salt in the water tank is going to affect the whole of the tank and not just the targeted issue. Some things to consider when installing a water-softening system are:

Rise in Sodium Levels:

Since a water softener uses brine, that means, a lot of sodium ions, it can end up increasing the amount of sodium ions in the water. Individuals with conditions where sodium is not beneficial for them may find soft water to be damaging. It is wise to select a water softener that is not based on salt. Luckily, consultants at WaterMart will be able to direct you to just the right one for you.

Could be Pricey:

Water softening systems can be expensive to install and maintain. However, we, at WaterMart, have made this system as easy for you as possible. Our extremely reliable, high-quality system at a very reasonable price is testimony to our expertise and a history of making Toronto water better.

Have al look at : How Much Does a Water Softener Cost

Reduces Mineral Intake

Calcium and Magnesium are flushed away through sodium by the water-softening system. Unfortunately, these two are also minerals that the human body requires. Receiving an adequate intake of minerals in your drinking water can deal away with this issue, without affecting your water-softening system.

Septic System Overload

Increased levels of sodium in soft water can overwhelm the septic system and mess up the pH levels. Corrosion due to salt can also cause the tank to affect the drainage system, especially if excess sodium causes solids to flow into pipes and clog them.

Produces Wastewater

Water softeners regenerate by flushing out the brine towards the wastewater sewer and causing large amounts of wastewater to collect. However, WaterMart’s newer and better technology has taken measurable steps to eliminate this issue, and our systems are environmentally healthy.

Conclusion

Investing in a water softening system can bring you long-term benefits, especially if it is from a reliable, industry-expert place like WaterMart. The Magnesium and Calcium ions cause extra damage to the pipelines and household cleaning, but sodium ions can attract them through resin beads and make our water soft. This leads to better skin and hair health along with making cleaning a hundred times easier and decreasing plumbing issues.
However, too much sodium can lead to pipeline corrosion. Fortunately, our experts at WaterMart have developed a world-class system to deal with your problems right here in Toronto. You can book a free water system consultation session here.

FAQs

Do water softeners require maintenance?

Yes, water softener systems require maintenance to perform in the best way possible. Our responsive customer support system deals with all your maintenance issues.

What should you know about salt replacement?

When the brine tank runs out of salt, it is necessary to replace the sodium chloride to ensure continuous softening of hard water. Adherence to regular maintenance can help regulate salt levels.

How long does a water softener last?

WaterMart’s high-quality water softening system can last up to a decade or two with regulated maintenance. The sign of a good water softener is its durability and ability to regenerate effectively.

What are the smart features of a water softener?

Our systems connect to your phone and they contain sensors to detect changes in mineral levels. The smart technology of our water-softening systems is a key factor in determining when to regenerate to save water and decrease sodium amount.

What are the best softener options?

WaterMart offers several softening options and systems, each with unique advantages. Our non-corrosive, long-term softeners will alleviate all your worries. While there is a flood of information on this topic, our experts can help guide you to the best options.

How do you choose the right softener?

Level of water hardness, salt-level sensitivities, and efficiency are some factors to consider. Luckily, our experts at WaterMart offer free consultations to help you determine the right softener for you.

How do you know your softening needs?

Identify signs of hard water in your household and conduct a water hardness test. When choosing a water softener, keep in mind your taste and preferences. Professional advice is a long-term investment. All you have to do is book a session here.

What is water softener salt?

Water softening salts like sodium chloride and potassium chloride are used to attract magnesium and calcium ions along with regenerating the resin beads to remove hardness.

How To Install a Kitchen Faucet? – Step-by-Step Instructions

Replacing a kitchen faucet is necessary because the faucets turn rusty and old over time, reducing the water flow. However, to save oneself from the cost of hiring a plumber to do the job, numerous people avoid installing a new one (the cost varies from $150 to $400 in 2024).

Luckily, with the right tools, installing a kitchen faucet is no harder than a DIY project. Instead of hiring an expert, you can do this task by yourself! But what you need is clear guidance on the installation process.

As an installation expert, I have discussed clear and easy instructions that you can follow for installing kitchen faucets. I will cover important areas like:

  • Tools required for the process
  • Proper and simple steps
  • Tips and techniques for successful installation
  • Common questions among customers

What You’ll Need for The Kitchen Sink Faucet Installation

Before you begin, you need to either purchase or find out some important plumbing tools and materials essential for the removal and installation of the kitchen faucet. If you just sit down to start installing a kitchen faucet without the availability of the required equipment, the process can never be successful. Let’s look into some of the tools you need to get.

Equipment/ Tools

The tools needed for the installation of a kitchen faucet are very common and can be easily found in any nearby metalware store or your tool bag. So, there is no need to worry about the inconvenience of finding the tools. The list of plumbing equipment is:

  • Plier
  • Adjustable wrenches
  • Putty knife
  • Rubber gasket
  • Nuts

Materials 

The materials or things that you may need during the process are listed below.

  • Kitchen Faucet
  • Bucket
  • Plumber tape
  • Cleaning agent
  • Soft cloth ( fiber )

As soon as you have all the tools and materials, read the steps below carefully and start implementing them.

Step-by-Step Guide On Installing Kitchen Faucet

There are many different types of kitchen faucets in the market, but each has a different removal and mounting process. Therefore, it is best if you first read the manufacturer’s manual that comes with your kitchen faucet box. There isn’t much difference with the procedure but there will be slight changes in the use of tools and the method of fixing the faucet in place.

Anyhow, the steps below follow a generalized method of replacing an old faucet with a new one, so you can follow them without any worry.

Shut Water Off at Supply Valves

First, shut off the hot and cold water valves to the sink. If you do not have a direct water supply under your sink, you need to turn off the main water supply. If the valves are stuck or harder to rotate, you can use a plier. Once this is done, clear the area under the sink. Put a small bucket inside the sink and turn on the faucet to drain any extra water running in it.

Disconnect Water Supply Lines

Next, use an adjustable wrench to disconnect the water supply line between the faucet and the supply valves. Unfasten the nuts connecting the tube. When the tubes are disconnected, tilt them in a bucket to ensure no water is leaking from the lines.

Remove Faucet Connections

Before removing the faucet, you need to remove its connections. For this, you should use the wrench to unscrew the nuts that connect the faucet from under the sink to the hose (supply lines). If you have a single-handle faucet, it is secured on a mounting bracket and nut that can be unscrewed easily.

Remove the Old Faucet

After removing the connections, you need to know to unmount the old faucet from its hole in the sink’s deck by pulling it out. Use the cleaner and the cloth to remove any dirt or debris surrounding the hole.

Install New Faucet

Now, it is time to install the new faucet. Pick up the rubber gasket and slide it down the supply tubes. Then, carefully mount the faucet onto the hole in the sink’s deck. Under the sink, add the mounting bracket and tighten the nut to fix the faucet in place.

Anchor Hot and Cold Valves

The next step is simple. You have to hold the supply tubes of the new faucet and connect them with their respective valves carefully. After that, tighten the nuts using the adjustable wrench.

Flush The Faucet & Check for Leaks

Your faucet is finally installed! But before you start using it, you have to turn the water on, remove the aerator, and let the water flow at full pressure. At this stage, you can look for any loose connections or leaks and tighten them. After a minute or two, put the aerator back in place and enjoy using your new faucet.

Tips for Installing a Kitchen Faucet

Sometimes it is difficult to loosen the nuts or remove the mounting bracket because it might be fixed in too tight. A simple trick to prevent this issue is to use a lubricant (oil). This reduces friction between the nuts and they can be easily unscrewed. Another tip is to apply medium pressure when removing the faucet so that you can get it out of the caulk seal without breaking anything else.

Do You Need an Expert or Can You DIY it?

The simple answer is: You can DIY it. Since the steps for installing the faucet are very simple and you do not need any demanding or complex material for the procedure, you can do it yourself without the service of an expert.

However, if you are worried about the risks of loose connections or harming the hardware, you can hire an expert for the job as well. Watermart provides exceptional services to all its customers and has a team of highly trained installation experts. They are very professional and approachable and will install your faucet properly, leaving no room for doubt.

What Are The Top Advantages Of A Kitchen Faucet With Sprayer?

Replacing your old faucet with a new one has many benefits. Number one is that the pressure and the flow of water become faster and better. Here’s a list of many other advantages of a kitchen faucet with a sprayer:

  • Easier to clean dishes because the flow of water is quicker.
  • You can adjust the sprayer and point it towards the specific area where you need the most water.
  • Prevents any leaking that your old faucet may have caused.
  • Two-handled faucet can also help adjust the temperature of your water.
  • The kitchen faucet with sprayer also has a compatible size water supply tube that can easily reach the main valves.

With these benefits, changing the kitchen faucet is definitely an advantageous decision.

What To Do After the Installation of Kitchen Faucet?

Although there are minimal chances of any leaking, it is a preventive measure to keep a regular check on any holes or leaks in the faucet’s connection. If there is any issue, you can call a plumber for immediate maintenance. It is also important to keep your faucet clean using a multi-purpose cleaner and fiber cloth so that there is no debris in the aerator or the end of the spout that can mix in the water.

Conclusion

We hope that you have understood all the steps, tips, and maintenance techniques for installing the kitchen faucet. It is a good choice to upgrade your kitchen faucet now to enhance your kitchen style and water flow. However, if you still find the installation process hard to grasp, our team of installation experts can help you.

You can contact us now and make an appointment. Our professional technician will be at your doorstep soon to install the faucet expertly. You can also sign up for a service contract to avail yourself of our installation and maintenance services.

FAQs

How long does it take to replace a kitchen faucet?

It usually takes an hour or two, but it may take relatively longer, depending upon the type of faucet and how expert you are with the tools.

How to change a kitchen faucet?

It is a simple process. You have to turn off the main water valves, disconnect the tubing, and remove the faucet. Then, you mount the new faucet with the nuts and connect it.

Is it hard to install a kitchen faucet?

No, but you should be familiar with the basic plumbing tools like a screwdriver and adjustable wrench.

How to Install a Reverse Osmosis Water Filtration System

As soon as many of our customers unbox the RO system, they get confused by the number of various colored wires it has. They sometimes also need help choosing the right tools and connecting all the tubes at the right places. Hiring an expert adds to the already high price of an RO system, which costs $400 – $700 on average in Toronto. If you have the same issues, you are at the right place.

Well, installing a reverse osmosis system is not as complex as it seems and does not require deep plumbing knowledge as long as you have all your drain pipes in place. Therefore, to explain the task of RO system installation, here is a detailed guide about the steps of its installation process for you.

We will also discuss the tools required and will answer some of the essential queries about this process. So, let’s begin and get your RO system installed quickly!

What You’ll Need For Reverse Osmosis System Installation? 

You can not install reverse osmosis water systems properly until you have all the right tools and pieces of equipment required. That’s why the first thing to do before you begin the RO water system installation is to gather the tools and materials needed for the job.

Equipment/ Tools

To avoid any inconvenience, you should bring your full plumbing tool bag with you because you can need any tool at any time. But there are some main tools that you will need during the installation. Here is the list of those tools so you can purchase them if you do not have them already:

  • Adjustable wrenches
  • Drill machine
  • Plastic tubing
  • Nuts
  • Ferrule
  • Compression fitting
  • Screwdriver

Materials 

In addition to the tools, there are also some of the other things that are needed to make the right connections. You should have those materials with you so that you do not get stuck mid-way through the process. The materials required in this process are:

  • Tubing
  • Adapters
  • Teflon tape
  • Measuring tape

And, of course, a reverse osmosis system is a must!

Step-by-Step Guide On Installing The RO System

If you want to put less burden on your pockets, you can install the reverse osmosis system by yourself. It may seem hard at first, but as soon as you get a grip on the different tools, you can easily complete the steps. Since the first question that comes to one’s mind is where to install a reverse osmosis system, let’s start with answering that first.

Installation Location

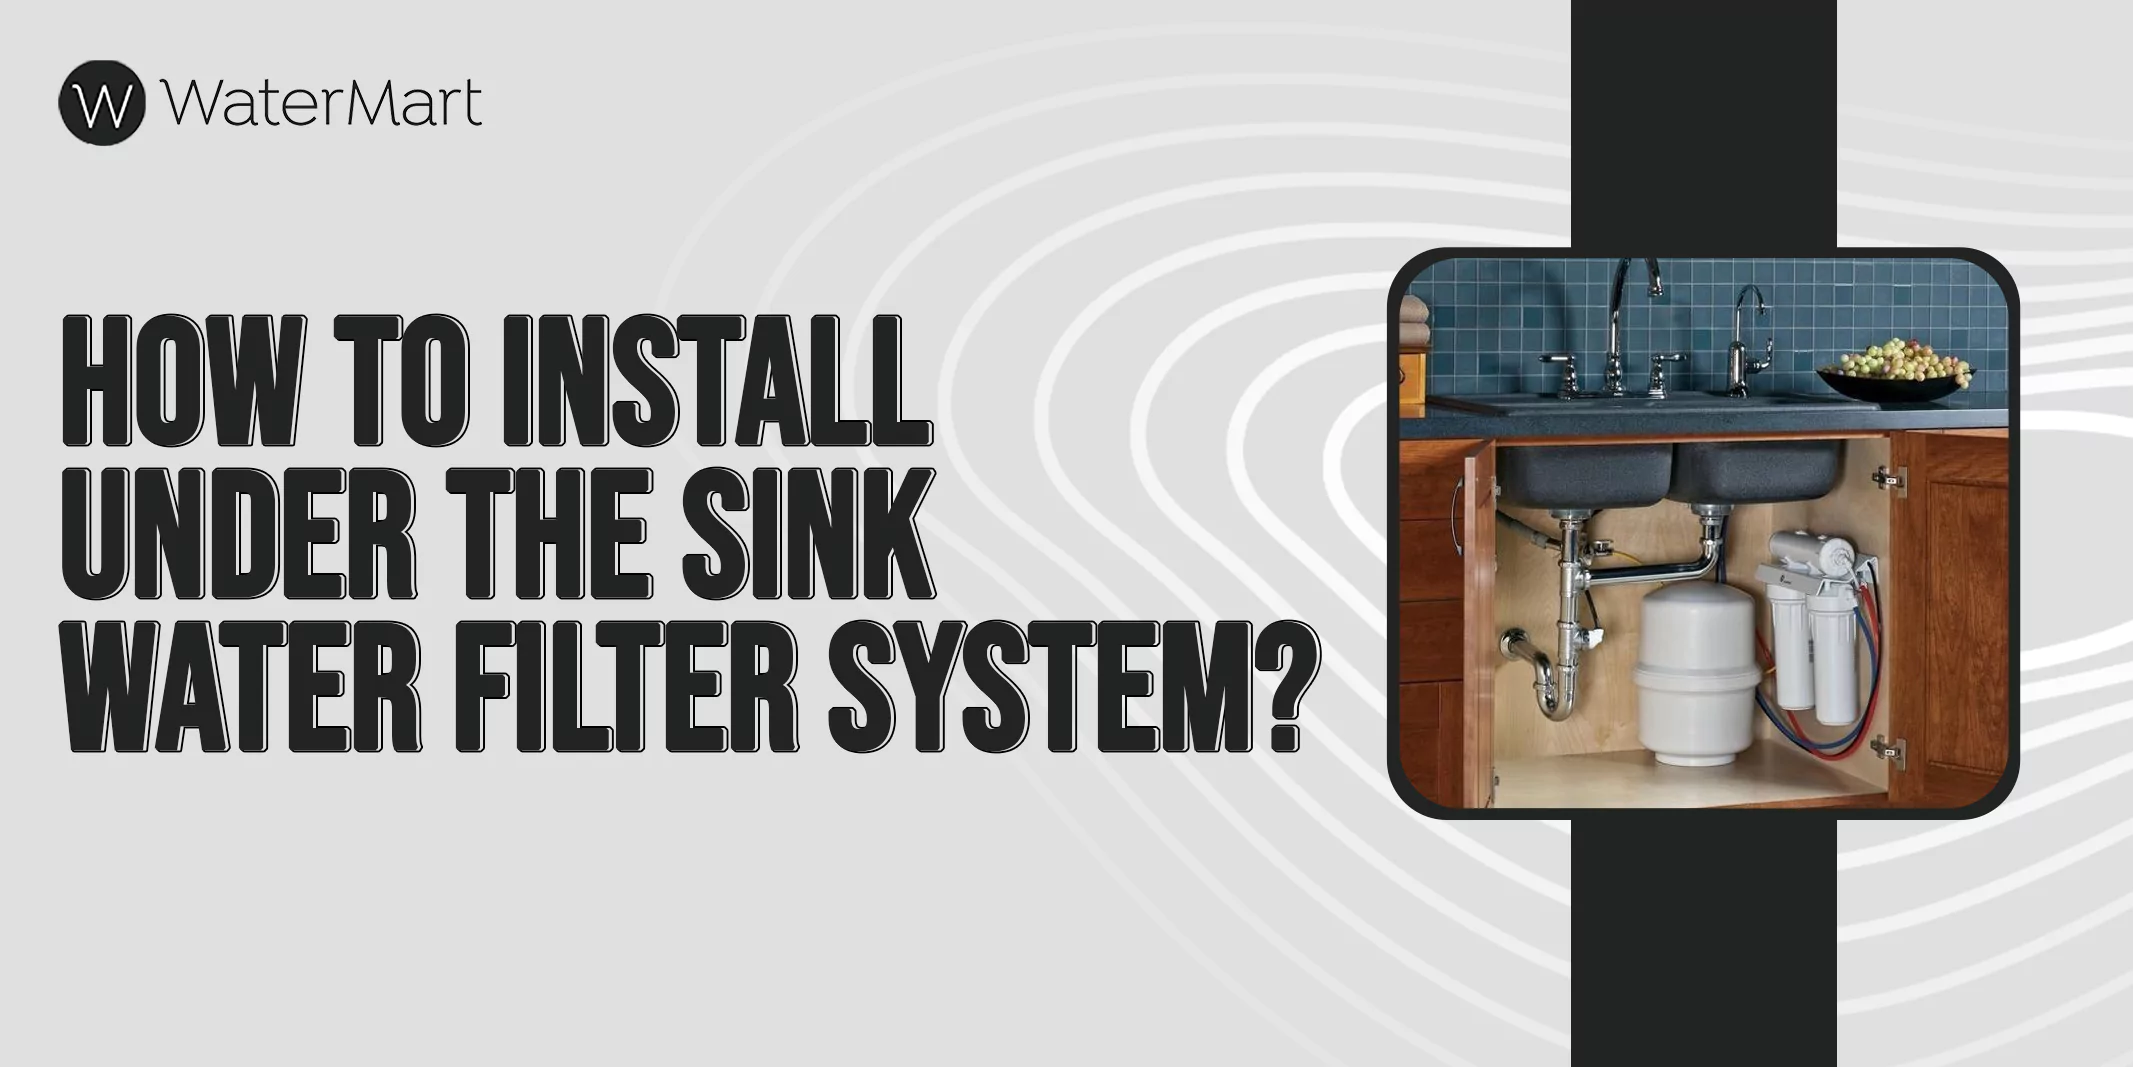
The best location to install your RO system is under the sink. However, you should be aware that an RO system is bigger in size so if you do not have adequate space, you can also install it in the basement or crawl space. The temperature of that location should also be moderate.

Prepare the RO System

Now, it’s time to unbox the RO system, but first, you need to turn off the hot and cold water valves. The reverse osmosis system consists of a sediment filter, a charcoal filter, a semipermeable membrane, a tank, and a faucet.

You should measure the tank and the filters to determine the required space. Once that’s done, we need to proceed to the next step.

Install the Sink Spigot

The next step is to install the sink faucet. Install it on your kitchen sink, where you will usually find a hole to fix the spigot. If there isn’t a proper space to mount the sink spigot, you can use your driller to make one hole. Once this is done, pick up the red tube and connect it to the faucet.

Prepare and Position the Tank

After installing the sink spigot, we move on to the next step of installing the main tank. Before positioning the main RO tank, you need to connect its nipple to the sink spigot. You can use Teflon tape to do this (I used the plumber’s tape) and screw it in tightly. Once done, place the main tank in the right place, perhaps just below the sink, where the space is enough.

Mount the Filter Assembly

There are usually 3 filters in an RO system. You can remove them and fix them on the wall next to the main tank. To do this, you need to first measure the filters’ heights to fix the hanger washers. Measure the height accurately using a measuring tape and then attack the hanger washers with nuts. Once done, mount the filter assembly onto the hanger washers.

Attach the Water Line

The RO system has different tubes. The first tube that needs to be connected is the green one. It is usually a quarter-inch long. Although you have already turned off the water supply, I am reminding you again that you need to keep it off when doing this. You have to connect the green tube using an adapter to the filter unit.

Connect the Other Tubing

The RO system has different tubes. The first tube that needs to be connected is the green one. It is usually a quarter-inch long. Although you have already turned off the water supply, I am reminding you again that you need to keep it off when doing this. You have to connect the green tube using an adapter to the filter unit.

Another tube goes out of the last filter (membrane) into the drain. Then, one tube is connected to the storage tank and a further tube links this tank with the spigot fixed on the kitchen’s deck.

Connect the Drain

Now, the final step is to connect the drain pipe. Measure the size of the filter’s drain tee and cut the drain pipe accordingly. Now secure the drain tee in the drain pipe using screws and nuts and link the tube to the drain.

Perform a Pressure Test

Finally, it is time to conduct a pressure test. Open the cold water valve and let it run through the faucet. Due to this, pressure will build up in the system. You can check for any leaking or loose connections. Once you are assured that everything is in place, your reverse osmosis water system is perfectly installed!

Although this may seem an easy way of installing a water system, many people are still confused if they should DIY it or hire an expert.

Do You Need an Expert or Can DIY it?

Installing a reverse osmosis system is not complicated and only requires basic knowledge of plumbing. With the right tools and materials, you can DIY it, which will also save you the expense of hiring a plumber.

However, if your drain and water pipelines are faulty, you might want an expert to fix them. Watermart accommodates its customers with exceptionally skilled installation experts who do their jobs with utmost care and expertise. Their services are not only reliable but also cost-effective.

Benefits of Installing a Reverse Osmosis System

The best result of the RO water system installation is that it removes 99% of contaminants and hard metals from the water. These are some of the chemicals and contaminants it filters out:

  • Lead
  • Fluoride
  • Inorganic compounds
  • Chlorine
  • Pesticides
  • Barium
  • Chromium
  • Arsenic
  • Volatile organic compounds

The RO system generates pure and better water which is healthier to drink and contains fewer chemicals preventing deterioration of the quality of the appliances. At Watermart, there is even an additional filtration stage in the reverse osmosis setup that elevates the content of minerals in the water.

After Installation of Reverse Osmosis System

After the RO system installation, you need to keep a regular check on its efficiency. It is better to replace membranes and sediment or charcoal filters on time to maintain the quality of the system.

However, even after the replacements, if you observe that the quantity of supplied water has decreased or if the water does not taste the same, you need to check the pressure of the system. You can use any low-pressure tire gauge to test if the pressure of the system is between the manufacturer’s standard pressure range.

RO Water System Installation Made Easy!

You do not need to worry about spending extra on hiring a plumber to install the reverse osmosis system for you. After reading this article, you might get all the information you need about installing an RO system with basic plumbing tools and equipment.

You can also learn about how the system works to understand its installation process better. Unlike other filter systems, reverse osmosis uses a semi-permeable membrane, where water is pushed through pressure to generate permeate (pure water). It is also comparatively easier to be installed if you follow the steps carefully. Even after following the steps, if the process of installation goes over your head, don’t worry we have you in safe hands.

At Watermart, installation experts are available 24/7 to assist customers. They will install the RO system for you and explain its whole working process and tips for maintaining it regularly. If you want consistent inspections of your filter system, you can sign up for a service contract as well. So, book an appointment now, and let us do the magic!

FAQs

Is reverse osmosis Water Healthy For The Human Body?

Yes, it removes 99% of contaminants from the water. Plus, there is no scientific evidence proving that it has any negative effects on the human body.

Can I Add a UV To My Reverse Osmosis System?

Yes, you can add a UV if you need extra safety of water, but it requires electricity so make sure you have enough power supply near the RO system.

Don’t Reverse Osmosis Systems Waste A Lot Of Water?

It doesn’t waste a lot of water, but the brine (impure water) separated from the pure water (permeate) is drained away as wastewater. Some RO systems also use excessive water in the process.

Can I Connect My Reverse Osmosis System To My Ice Maker Or Refrigerator?

Yes, you can connect them using a permeate pump to avoid wasting pressure.

Do reverse osmosis systems require electricity?

No, they operate on the phenomenon of water pressure.

How to Install a Water Softener System – Step By Step Guide

Hiring an expert plumber in Toronto can be quite expensive at times. That’s why most people try installing their water softener systems by themselves. However, installing a water softener is not as easy as it sounds because you will need detailed knowledge about using each tool correctly. And then there is the risk of causing damage to the softener or getting an electric shock while making connections. 

We have discussed safe and easy steps to install a water softener system to solve this issue. Since each step is explained in detail, there will be no chance of making a wrong connection or mixing up the steps.

This article covers the tools, materials, location, and facilities required for a water softener and provides a step-by-step guide on installing it properly. So, let’s see if you can install a water softener system on your own!

Before You Begin the Water Softener Installation

Installing a water softener system is an expensive investment. That’s why, before you install one, you should make sure whether you really need it and whether your house has the proper location and facilities to accommodate it. 

Soft water can also sometimes corrode the water pipelines and increase levels of sodium in water. Therefore, here are a few ways to decide if installing a water softener is a good option for you.  

residential water softener installation

Test the Water Supply

Mildly hard water does not require softening. You can check the hardness level of your water using a test kit for hard water or you can enquire your water supplier about how hard the water is. If the hardness level is more than 7 grains hard (per gallon), then you should consider installing a water softener system. 

Check Your Utilities

If you want to get your water tested for its level of hardness or impurity, you can book a free water test at Watermart, and they will give you more information about your water supply. A full report will be provided to you regarding the contents of your water. 

The result will also clarify whether you need a water softener or not. You can schedule a free water test now by filling out this form. If the water you use comes from a river, it is usually softer compared to water flowing through wells. 

Select Proper Location

Once you have tested the water supply and decided to invest in a plumbing water softener in your house, the first step is to find a proper location. The best place is near the main water supply of your house but before a heater unit. The main supply of water is usually in the basement or crawlspace. 

The water softener system contains a salt tank and a resin tank and is around 54-68 inches tall, so it needs a bigger space. You should also make sure that there is a 110V to 120V power supply near the water softener.  

What You’ll Need For Water Softener Installation 

You can not just start installing the water softener without access to the right tools and materials. Therefore, you must know which tools are compulsory before you start setting up the water softener system. 

Equipment/ Tools

You never know which tool you might need at the last moment when you are stuck with a wire in your hand and can not move! That’s why you should keep your full bag of plumbing tools with you to prevent any such emergency. But here are the most important ones that you should surely have for the process:

  • Hose clamp 
  • Adjustable wrenches 
  • Torch 
  • Screwdriver 
  • Screws

Materials

Usually, the materials and parts needed for the installation process are mentioned in the manufacturer’s manual. You can go through that so that you do not miss anything. Here are some important materials used for setting up the water softener system: 

  • Water softener
  • Bypass valve
  • Plastic tube
  • Compression fittings
  • Air gap fitting
  • Drain tubing

Step-by-Step Guide On Installing

Now, we will start with the main installation process. You should keep in mind that different water systems have different structures and might have some changes in their installation process, but these are the general steps that will give you a clearer idea of the process. It is better to read each step carefully and complete them one by one. So, let’s begin!

installation of water softener

Install a Bypass Valve

Every water softener comes with a bypass valve that stops the flow of water to the water softener if it’s being replaced or serviced. You can install this bypass valve at the back of the water softener system or on the main water pipeline. Tighten this valve with clips. 

Shut off the Water

The next step is to turn off the main shut-off valve and remove any water left in the pipelines. You must also turn off your heater unit before you start installing the softener system.    

Tie Into the Water Supply Line

Cut the water supply line carefully using a pipe cutter. You need to connect the water softener system lines to the main water supply lines. For this, you can either use copper piping or flexible pipes and attach elbow fittings. 

The fittings you need depend on the size and type of pipe you are using. Secure the pipes using adjustable wrenches. Connect one pipe to the inlet port of the bypass valve and one to the outlet port.

Fill and Connect the Tanks

There are two tanks in the water softener system. The resin tank contains resin beads that attract positively charged calcium and magnesium away from the water. This tank is usually built in. The second tank is the brine tank. You need to fill this tank with salt. Salt drains away these hard minerals from the resin beads. 

If there is enough space, you can either place the brine tank near the water softener or a bit further away. If you are placing it a bit away from the system, you can connect both tanks using 3/8 plastic tubing and a compression fitting. The size depends on the distance between the tanks.

Connect Drain Tubes

You need to connect drain tubes to run away water in the drainage. Connect the drain line to the drain elbow and secure it with a hose clamp. You can also connect drain tubes to air gap fittings on a washing machine if you are using one. 

Turn the Water and Start the Unit

Once everything is secured in place, turn on the main supply of water, plug in the water softener, put a water timer on, and add the hardness level of your water. Then, check the water running through your faucets, and see if you can feel any difference.

Run the Backwash Cycle

Lastly, you need to run a backwash cycle to complete the installation process. This process loosens the resin beads and helps check for leakage signs.

Do You Need an Expert, or Can you DIY it?

If you are good at DIY and have a little more than basic plumbing knowledge, there is a chance that you might be able to install a water softener system yourself. However, since you have to make many complex connections, it is better to hire a plumber to do this task for you.  

At Watermart, we have installation experts who are highly trained in carefully using the right tools. They will install the water softener system expertly, leaving no chance of loose nuts! That’s why if you are scared you might mess up installing a water softener system, you can get our water softener service for optimum results. 

Benefits of Installing a Water Softener

There are numerous benefits of installing a soft water system. The drinking water tastes better, and there will be no water spots on the sinks, utensils, or clothes. A softener elevates the quality of your home water. It also extends the life of all appliances like washing machines and dishwashers because it does not leave any stains on them. 

Once you install your water softener, you do not need to worry about getting dirty stains on your clothes, appliances, dishes, walls, or counters!

What To Do After Installing it

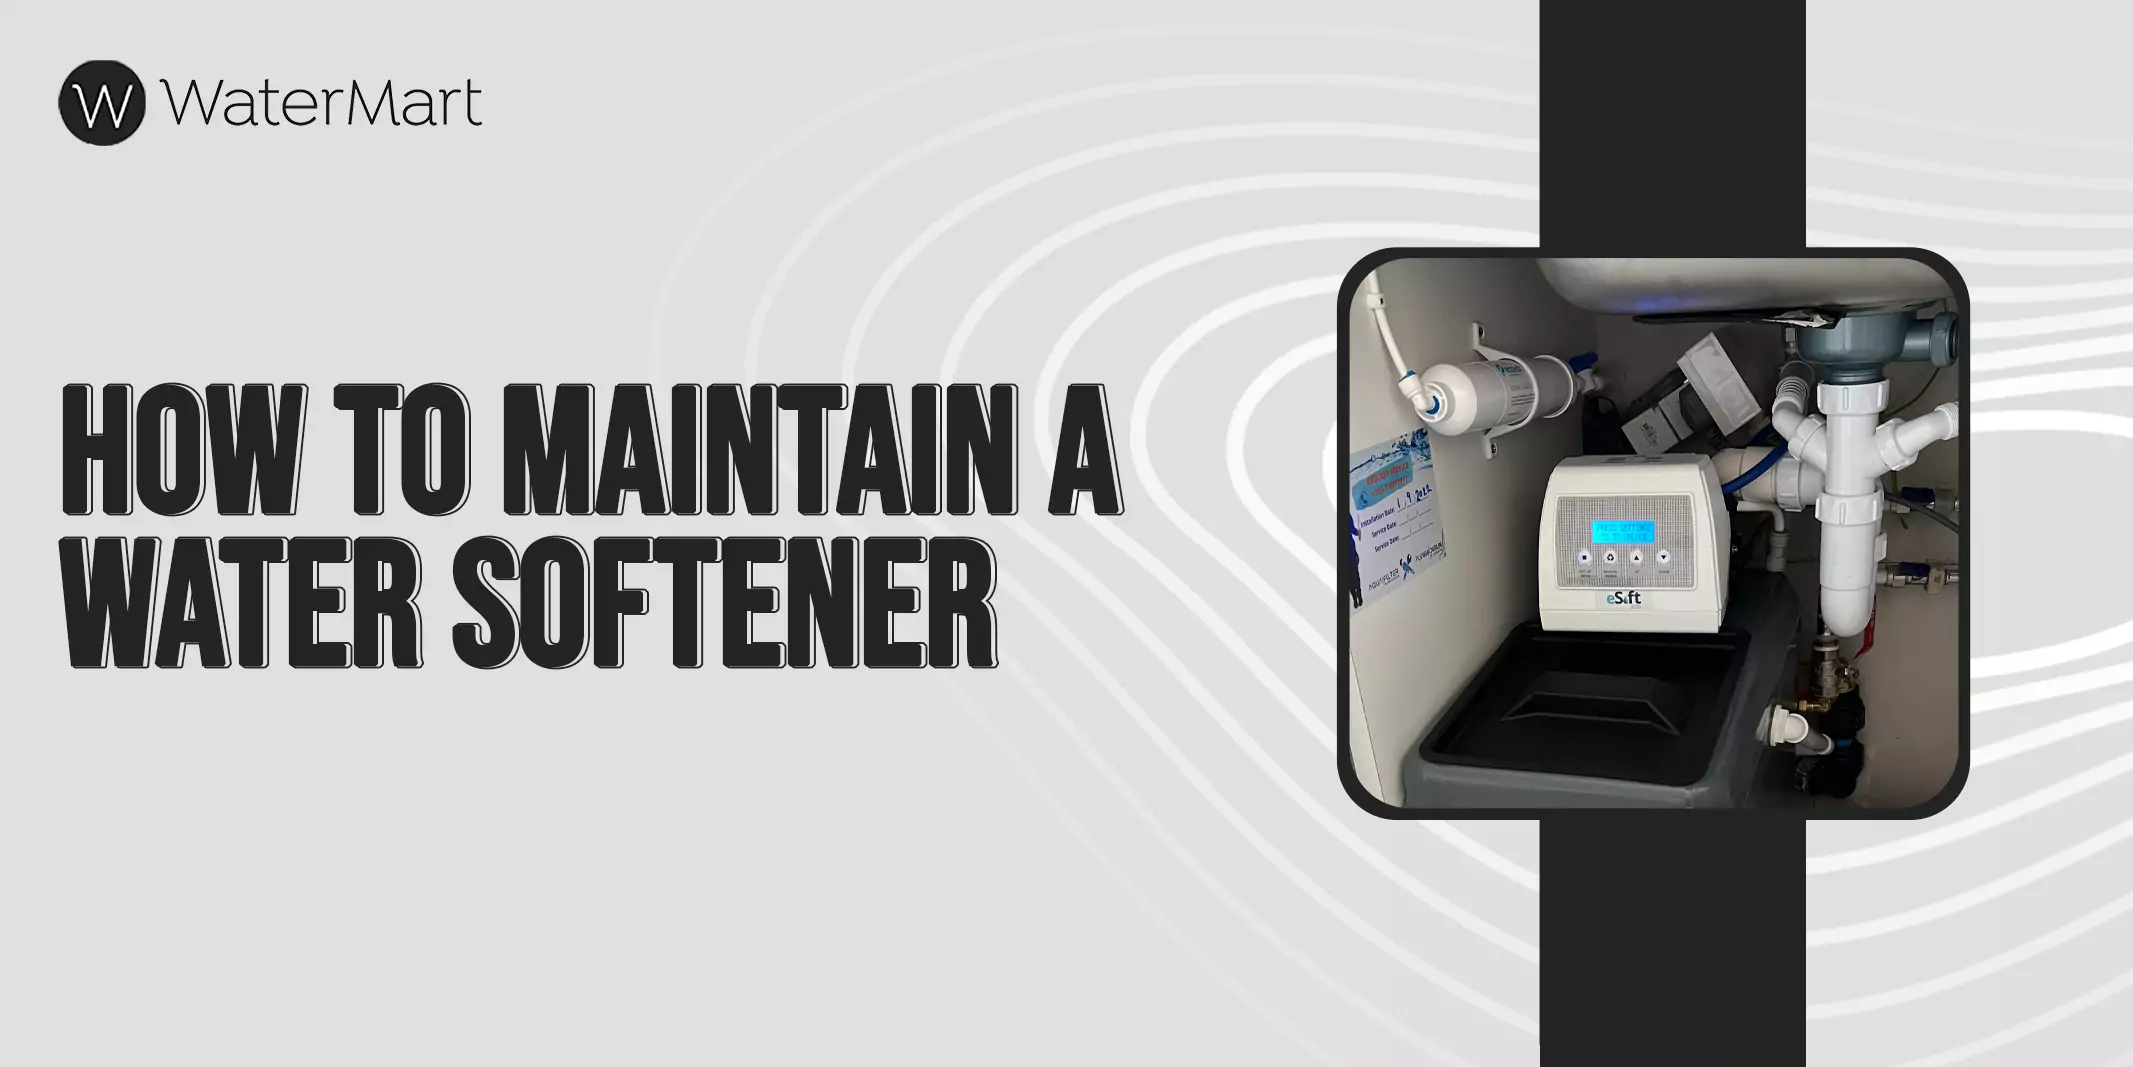
Like every other electrical appliance, a water softener system needs regular maintenance and checking. You should check the brine tank every month to observe the salt level. The tank’s lid can easily be opened. If the salt level seems lower, you should add more salt. 

Usually, you will only need to add salt content twice a year. Watermart also offers service contracts, where our expert plumber will check on your water softener’s performance. Replacing and maintaining it is necessary to ensure the safety of water and keep it soft. 

Conclusion

Installing a water softener system might seem complex if you are new to plumbing tools and DIY projects. In such a case, you can hire an expert plumber to do the job for you. Buying a water softener is a good choice if your water is very hard and leaves stains everywhere. 

So, what are you waiting for? If your water meets the requirements for needing a softener and your household is feasible for getting one installed, buy one from a reliable brand now and start the installation process!

FAQ’s

Can I install a water softener myself?

Yes, you can install a water softener if you are good at DIYing and have knowledge about using plumbing tools. 

When does hard water require softening?

Hard water requires softening when it reaches the hardness level of more than 7 grains per gallon. 

Do water softener systems need a drain?

Yes, to drain away water during the regeneration process in the water softener.

How To Install Whole House Water Filtration System In 2024

Installing a whole-house water filtration system is not everyone’s cup of tea. While some people manage to perform a DIY installation, others get stuck due to the use of complex plumbing tools.

Even if you have all the required equipment, securing the connections is yet another complicated task. Although the whole-house water filter setup requires good plumbing skills, you can DIY it with the right guidance regarding its installation.

That’s why, in this article, I have discussed every minor detail you need to know about the installation process. From the tools and materials needed to install the whole house water filter to a step-by-step guide on installation, there is everything that will make this task very easy for you.

So, without further ado, let’s look into the detailed guide below!

What You’ll Need For Installing Whole House Water Filter? 

To make every project successful, you should have the proper tools and materials you will need during the process. Similarly, before you start installing the whole-house water filtration system, the main question is what pieces of equipment you need to complete the setup without any complications.

Equipment/Tools Required

You will require:

  • Drill machine
  • An adjustable wrench
  • Screwdriver
  • Screws
  • Pipe fittings
  • Pipe cutter

It is better to keep all your plumbing equipment with you like a tech gun, and gauge plugs.

Materials Needed

The materials you will need before installing a whole-house water filter are:

  • A stool
  • A whole house water filter system from a reliable brand
  • Any bucket to fill the leftover water coming out from the main shut-off valve
  • Plumber’s thread tape

Once you have all the things ready, we can proceed to the main part of installing the water filter.

Step-by-Step Guide On Water Filter Installation

In this section, I have jotted down all the steps to position your whole house water filter properly in the right place. If you follow these steps carefully, by the end, you will have a whole house water filter system working in your house without any leaking or loose connections.

Plus, it will also save you the cost of hiring a plumber. Let’s start by finding the best location for the water filter setup:

If you Are in hurry you can check our infographic of water filter installation Guide:

Water Filter Installation Guide

Find the Best Location

Before you open your bag of tools and start installing them, the first question is where to install a whole-house water filter. The best place to install the water filter is near your main water supply because that is where the water enters your house’s pipelines.

It is also important to install your water filter away from humidity and moisture. That’s why the main shut-off valve is the best location to start with.

Turn off the Water Supply and Remove the Pipe Section

Once you have decided on the location, you need to turn off the main water supply. You can use a bucket to collect leftover water leaking from the valve. Next, use the measurements in the manual to measure the pipe’s size to set up the water filter.

Cut the part of that pipe very precisely and carefully. Make sure that you choose a position where you can easily replace the water filter whenever needed.

Install Filters and Shut-Off Valves

There is a manufacturer’s guide and manual with the filter that explains how to install the new shut-off valves. Use the guide to screw in the nails and fix the water filter in the right place. First, do not tighten the nuts.

Secure the Connections

When you have installed it, test the filter by running the water. Turn on the main valve and check the water in all taps. If it works according to your needs and satisfies your need for clean and pure water, go back to the filter and tightly secure it in place. You should use the plumbers thread tap to seal it in more properly, and it’s done!

Do You Need an Expert or Can DIY it?

Although it is easy to install it yourself using the manual, you can also get an expert to do it quickly and professionally. Our expert workers at Watermart are highly trained with plumbing tools and will install water filter for you and answer every query you have regarding its installation process.

We are the best water filter providers in Toronto, and we even offer customized water systems to meet our customers’ demands. The workers will also assist you with the maintenance and replacement of filter cartridges, membranes, and valves whenever required.

What Types of Impurities Do These Filters Eliminate?

Once you install the water filtration system, you will get complete access to pure water free of any impurities. The multiple-stage filtration removes 99% of chemical compounds like:

  • Nitrates
  • Sodium
  • Iron 
  • Sulfur
  • Chlorine
  • Lead

Home water filter system

It also purifies the water from dissolved solids, organic compounds, metals, and bacteria making it safer and healthier for use.

This filtered water has a better quality and a better taste than the unfiltered water. In addition to providing good quality water, the filter also removes any odors present in the liquid. The purified water is good for drinking and will also help in brighter laundry.

What Is The Aftermath of Installing Water Filtration System?

After installing a whole-house water filter, you also need to check its performance. It is important to maintain and replace filter cartridges regularly to ensure the purity of water and the safety of your health.

At Watermart, we offer service contracts where our workers will visit your place to check for any worn-out or damaged parts or clogging of valves and pipes. In any case, it is better to replace the filters after every six months. You can also monitor any changes in the pressure of water flowing in the taps. If it seems unusual, you should contact a consultant to get it checked.

Install Your Whole House Water Filter Now!

Whole house water filtration is a cost-effective, easy-to-set-up, and efficient way to filter the main supply of water in your house. It is extremely significant to remove the presence of any impurities in the water that you use for your house chores or daily consumption.

All you need is proper plumbing expertise, the right location, and a whole-house water filter, which you can simply install with your main water supply. Once installed properly, water flowing through your pipelines is free from dust particles, organic compounds, germs, and harmful chemicals like chlorine, lead, nitrates, and mercury.

So what are you waiting for? Get a whole-house water filtration system for your home now!


FAQ’s

How frequently should the filter be maintained or replaced?

It is preferred to replace and maintain your filters (carbon and sediment) and filter cartridges after every 3-6 months. Some people also replace their filters after 12 months.

Can I install these filters myself?

Yes, if you have a little knowledge about plumbing and its tools, you can conveniently install a whole house water filter on your own.

Are these filters suitable for well water?

Yes, it can also purify well water, but an ultraviolet (UV) filter is more suitable for well water.

How long does It take to install a water filtration system?

Installing a water filter usually takes around 2 hours. However, if you are inexperienced and setting it up for the first time, it can take comparatively longer.

How long do water filters last?

Most water filters last for 6 to 12 months. It is better to get them replaced or at least maintained within a year. Very few water filters are also known to last for two years.

How much does it cost to install a whole-house water filtration system?

Our water filter is very cost-effective, but the average cost of installing a whole-house water filter ranges between $1044 and $3266. It mostly depends upon the brand and type of water filter you choose. Call us or fill out the form to learn more about the cost of the system and its installation.