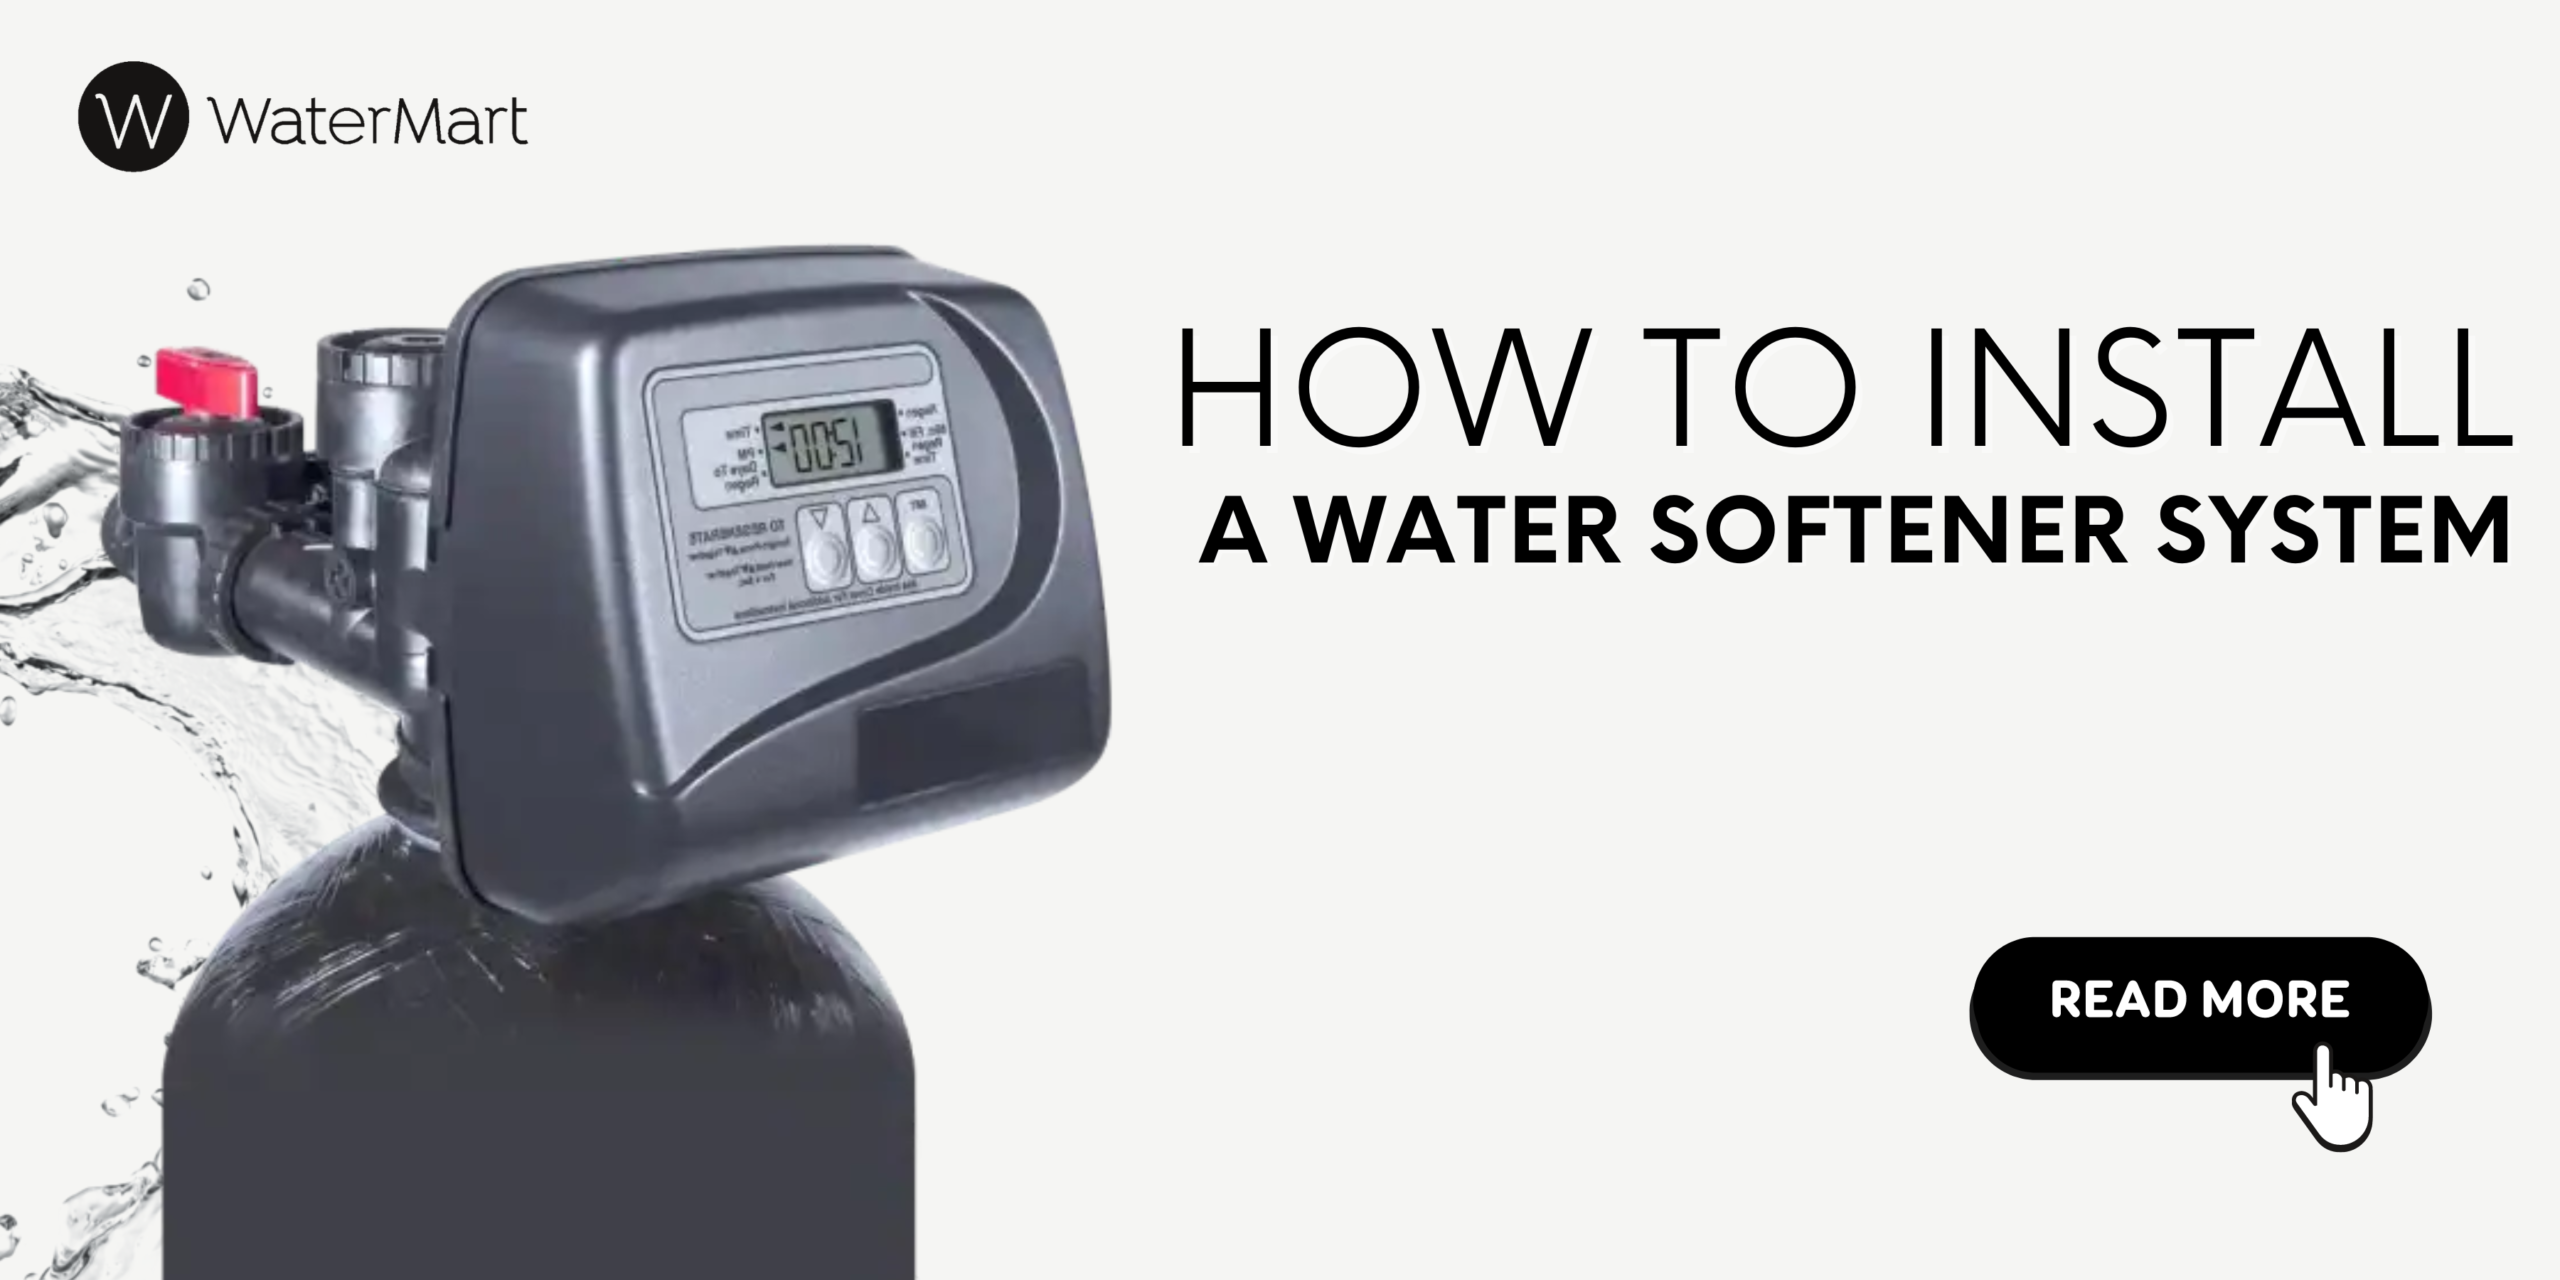
How to Install a Water Softener System?
Hiring an expert plumber in Toronto can be quite expensive at times. That’s why most people try installing their water softener systems by themselves. However, installing a water softener is not as easy as it sounds because you will need detailed knowledge about using each tool correctly. And then there is the risk of causing damage to the softener or getting an electric shock while making connections.
We have discussed safe and easy steps to install a water softener system to solve this issue. Since each step is explained in detail, there will be no chance of making a wrong connection or mixing up the steps.
This article covers the tools, materials, location, and facilities required for a water softener and provides a step-by-step guide on installing it properly. So, let’s see if you can install a water softener system on your own!
Before You Begin the Water Softener Installation
Installing a water softener system is an expensive investment. That’s why, before you install one, you should make sure whether you really need it and whether your house has the proper location and facilities to accommodate it. You can face some problem during intallation in your house.
Soft water can also sometimes corrode the water pipelines and increase levels of sodium in water. Therefore, here are a few ways to decide if installing a water softener is a good option for you.
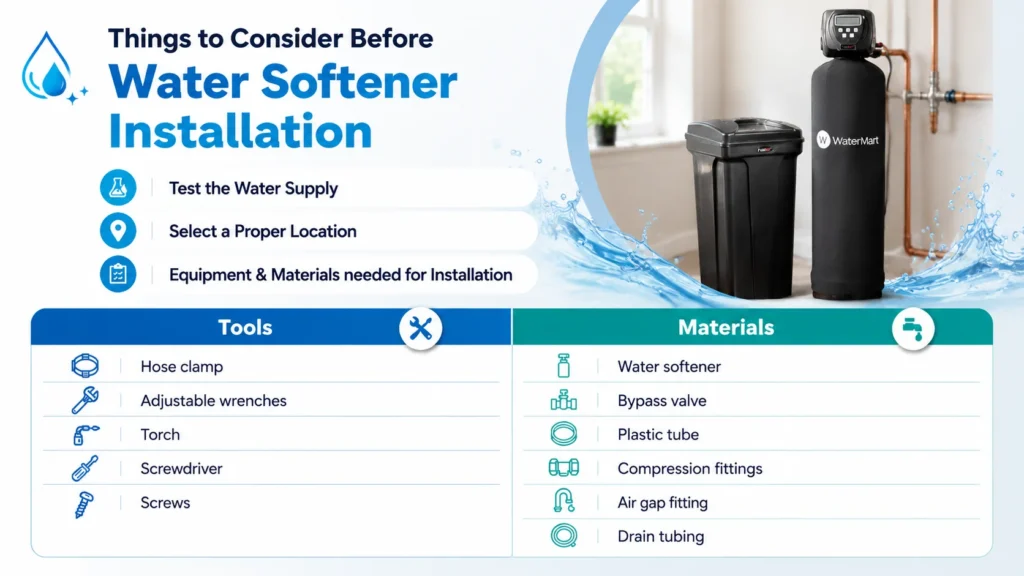
Test the Water Supply
Mildly hard water does not require softening. You can check the hardness level of your water using a test kit for hard water or you can enquire your water supplier about how hard the water is. If the hardness level is more than 7 grains hard (per gallon), then you should consider installing a water softener system.
Check Your Utilities
If you want to get your water tested for its level of hardness or impurity, you can book a free water test at WaterMart, and they will give you more information about your water supply. A full report will be provided to you regarding the contents of your water.
The result will also clarify whether you need a water softener or not. You can schedule a free water test with WaterMart. If the water you use comes from a river, it is usually softer compared to water flowing through wells.
Select Proper Location
Once you have tested the water supply and decided to invest in a plumbing water softener in your house, the first step is to find a proper location. The best place is near the main water supply of your house but before a heater unit. The main supply of water is usually in the basement or crawlspace.
The water softener system contains a salt tank and a resin tank and is around 54-68 inches tall, so it needs a bigger space. You should also make sure that there is a 110V to 120V power supply near the water softener.
What You’ll Need For Water Softener Installation
You can not just start installing the water softener without access to the right tools and materials. Therefore, you must know which tools are compulsory before you start setting up the water softener system.
Equipment/ Tools
You never know which tool you might need at the last moment when you are stuck with a wire in your hand and can not move! That’s why you should keep your full bag of plumbing tools with you to prevent any such emergency. But here are the most important ones that you should surely have for the process:
- Hose clamp
- Adjustable wrenches
- Torch
- Screwdriver
- Screws
Materials
Usually, the materials and parts needed for the installation process are mentioned in the manufacturer’s manual. You can go through that so that you do not miss anything. Here are some important materials used for setting up the water softener system:
- Water softener
- Bypass valve
- Plastic tube
- Compression fittings
- Air gap fitting
- Drain tubing
Step-by-Step Guide On Installing
Now, we will start with the main installation process. You should keep in mind that different water systems have different structures and might have some changes in their installation process, but these are the general steps that will give you a clearer idea of the process. It is better to read each step carefully and complete them one by one. So, let’s begin!
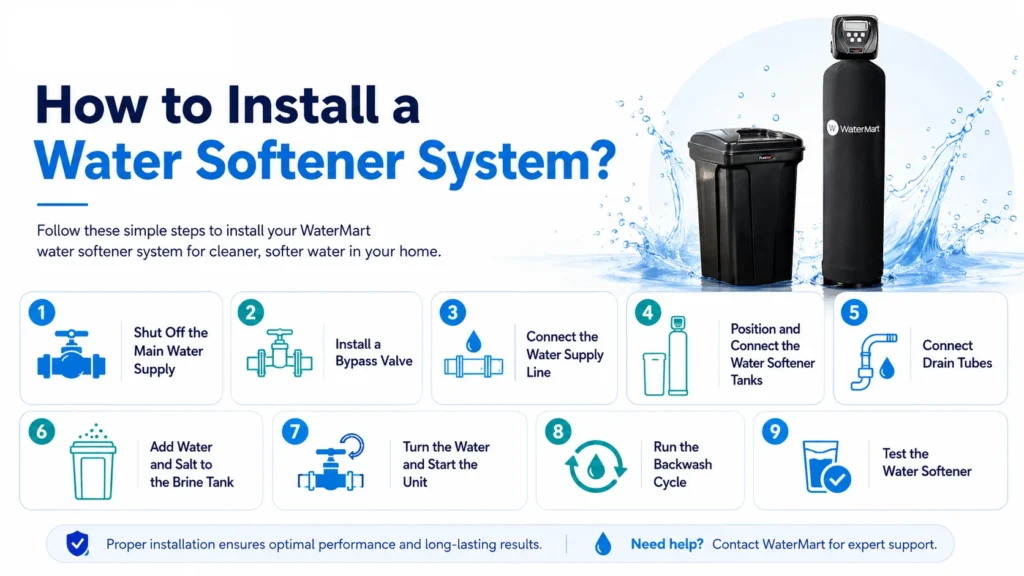
Install a Bypass Valve
Every water softener comes with a bypass valve that stops the flow of water to the water softener if it’s being replaced or serviced. You can install this bypass valve at the back of the water softener system or on the main water pipeline. Tighten this valve with clips.
Shut off the Water
The next step is to turn off the main shut-off valve and remove any water left in the pipelines. You must also turn off your heater unit before you start installing the softener system.
Tie Into the Water Supply Line
Cut the water supply line carefully using a pipe cutter. You need to connect the water softener system lines to the main water supply lines. For this, you can either use copper piping or flexible pipes and attach elbow fittings.
The fittings you need depend on the size and type of pipe you are using. Secure the pipes using adjustable wrenches. Connect one pipe to the inlet port of the bypass valve and one to the outlet port.
Fill and Connect the Tanks
There are two tanks in the water softener system. The resin tank contains resin beads that attract positively charged calcium and magnesium away from the water. This tank is usually built in. The second tank is the brine tank. You need to fill this tank with salt. Salt drains away these hard minerals from the resin beads.
If there is enough space, you can either place the brine tank near the water softener or a bit further away. If you are placing it a bit away from the system, you can connect both tanks using 3/8 plastic tubing and a compression fitting. The size depends on the distance between the tanks.
Connect Drain Tubes
You need to connect drain tubes to run away water in the drainage. Connect the drain line to the drain elbow and secure it with a hose clamp. You can also connect drain tubes to air gap fittings on a washing machine if you are using one.
Turn the Water and Start the Unit
Once everything is secured in place, turn on the main supply of water, plug in the water softener, put a water timer on, and add the hardness level of your water. Then, check the water running through your faucets, and see if you can feel any difference. You can also perform a simple water softener test at home to make sure your water softener is working properly.
Run the Backwash Cycle
Lastly, you need to run a backwash cycle to complete the installation process. This process loosens the resin beads and helps check for leakage signs.
Do You Need an Expert, or Can DIY it?
If you are good at DIY and have a little more than basic plumbing knowledge, there is a chance that you might be able to install a water softener system yourself. However, since you have to make many complex connections, it is better to hire a plumber to do this task for you.
At WaterMart, we have installation experts who are highly trained in carefully using the right tools. They will install the water softener system expertly, leaving no chance of loose nuts! That’s why if you are scared you might mess up installing a water softener system, you can get our water softener service for optimum results.
Benefits of Installing a Water Softener
There are numerous benefits of installing a soft water system. The drinking water tastes better, and there will be no water spots on the sinks, utensils, or clothes. A softener elevates the quality of your home water. It also extends the life of all appliances like washing machines and dishwashers because it does not leave any stains on them.
Once you install your water softener, you do not need to worry about getting dirty stains on your clothes, appliances, dishes, walls, or counters!
What To Do After Installing it
Like every other electrical appliance, a water softener system needs regular maintenance and checking. You should check the brine tank every month to observe the salt level.The tank’s lid can easily be opened. If the salt level seems lower, you should add more salt. Usually, you will only need to add salt content twice a year. WaterMart Toronto also offers service contracts, where our expert plumber will check on your water softener’s performance. Replacing and maintaining it is necessary to ensure the safety of water and keep it soft.
Conclusion
Installing a water softener system might seem complex if you are new to plumbing tools and DIY projects. In such a case, you can hire an expert plumber to do the job for you. Buying a water softener is a good choice if your water is very hard and leaves stains everywhere.
So, what are you waiting for? If your water meets the requirements for needing a softener and your household is feasible for getting one installed, buy one from a reliable brand now and start the installation process!
FAQ’s
Can I Install a Water Softener Myself?
Yes, you can install a water softener if you are good at DIYing and have knowledge about using plumbing tools.
When Does Hard Water Require Softening?
Hard water requires softening when it reaches the hardness level of more than 7 grains per gallon.
Do Water Softener Systems Need a Drain?
Yes, to drain away water during the regeneration process in the water softener.