How To Measure Water Hardness | 8 Methods for Home & Lab Testing
That stubborn spot on your glass that doesn’t go away even after washing. That annoying white crust on your faucet. And that itchy, dry feeling on your skin after a shower. They may seem random nuisances to you, but in reality, they are the telltale signs of hard water in your home. Your water may appear clear, but the invisible hardness minerals in your water are silently working against your health, plumbing, appliances, and comfort.
Most of Canada struggles with hard water, and testing your water is the first step in selecting the correct treatment for your supply. To test water hardness, you can perform a quick soap test, use water testing strips, try a DIY home water test kit, get the water tested from an independent certified lab, have an in-home professional water assessment, use an electronic water hardness tester, or rely on titration techniques.
In the guide below, you’ll learn how to test water hardness, what the water hardness values signify, and possible steps to take after the test. We’ll also cover several treatment options that can protect your appliances, plumbing, and overall health.
Key Takeaways
- Water hardness is usually measured in water hardness grains per gallon (gpg) or parts per million (ppm).
- There are several kinds of tests for hard water, including test strips, a home hardness test kit, DIY soap tests, digital devices, lab testing, and professional inspections.
- Digital water hardness testers and lab analyses are the most accurate water hardness testing methods.
- Getting your water hardness classification helps you decide whether treatment is required and the most relevant method for your needs.
- Water above 7 gpg leads to significant scale buildup, increased appliance wear, and compromised soap efficiency.
What is Hard Water?
Hard water contains high levels of minerals, primarily calcium (Ca²⁺) and magnesium (Mg²⁺) ions. Canadian municipal water and groundwater pick up these minerals as they pass through mineral-rich rock formations, limestone, and chalk. Typically, water hardness is measured in grains per gallon (gpg) or milligrams per liter (mg/L). Levels above 60 mg/L (3.5 gpg) are considered hard.
While moderately hard water isn’t dangerous to consume if you’re healthy, it can lead to various problems. Individuals with medical issues and a compromised immune system need drinking water of better quality.
Moreover, scale buildup from hard water can decrease water heater efficiency by up to 50%. It also shortens the lifespan of appliances and leaves mineral residue on your skin and hair that causes dullness, dryness, and itching. According to Health Canada, hardness levels above 200 mg/L (11.7 gpg) cause significant scaling in pipes and water heaters.
If you suspect you have hard water, get your home water tested. WaterMart offers a free water hardness test to help you understand your water quality. The results will help you choose the right water treatment moving forward.
But first, look for these common signs of hard water in your home:
- A white chalky residue on faucets, showerheads, and water-using appliances. Like kettles, coffee makers, washing machines, and dishwashers
- Stiff, faded laundry.
- Soap scum and rings on bathtubs, sinks, and dishes.
- Dull, weak hair and dry skin, especially after showering.
- Decreased soap and detergent efficiency, leading to higher consumption.
- Reduced water heater performance.
- Spots and streaks on utensils and glassware.
- Frequent plumbing and maintenance issues.
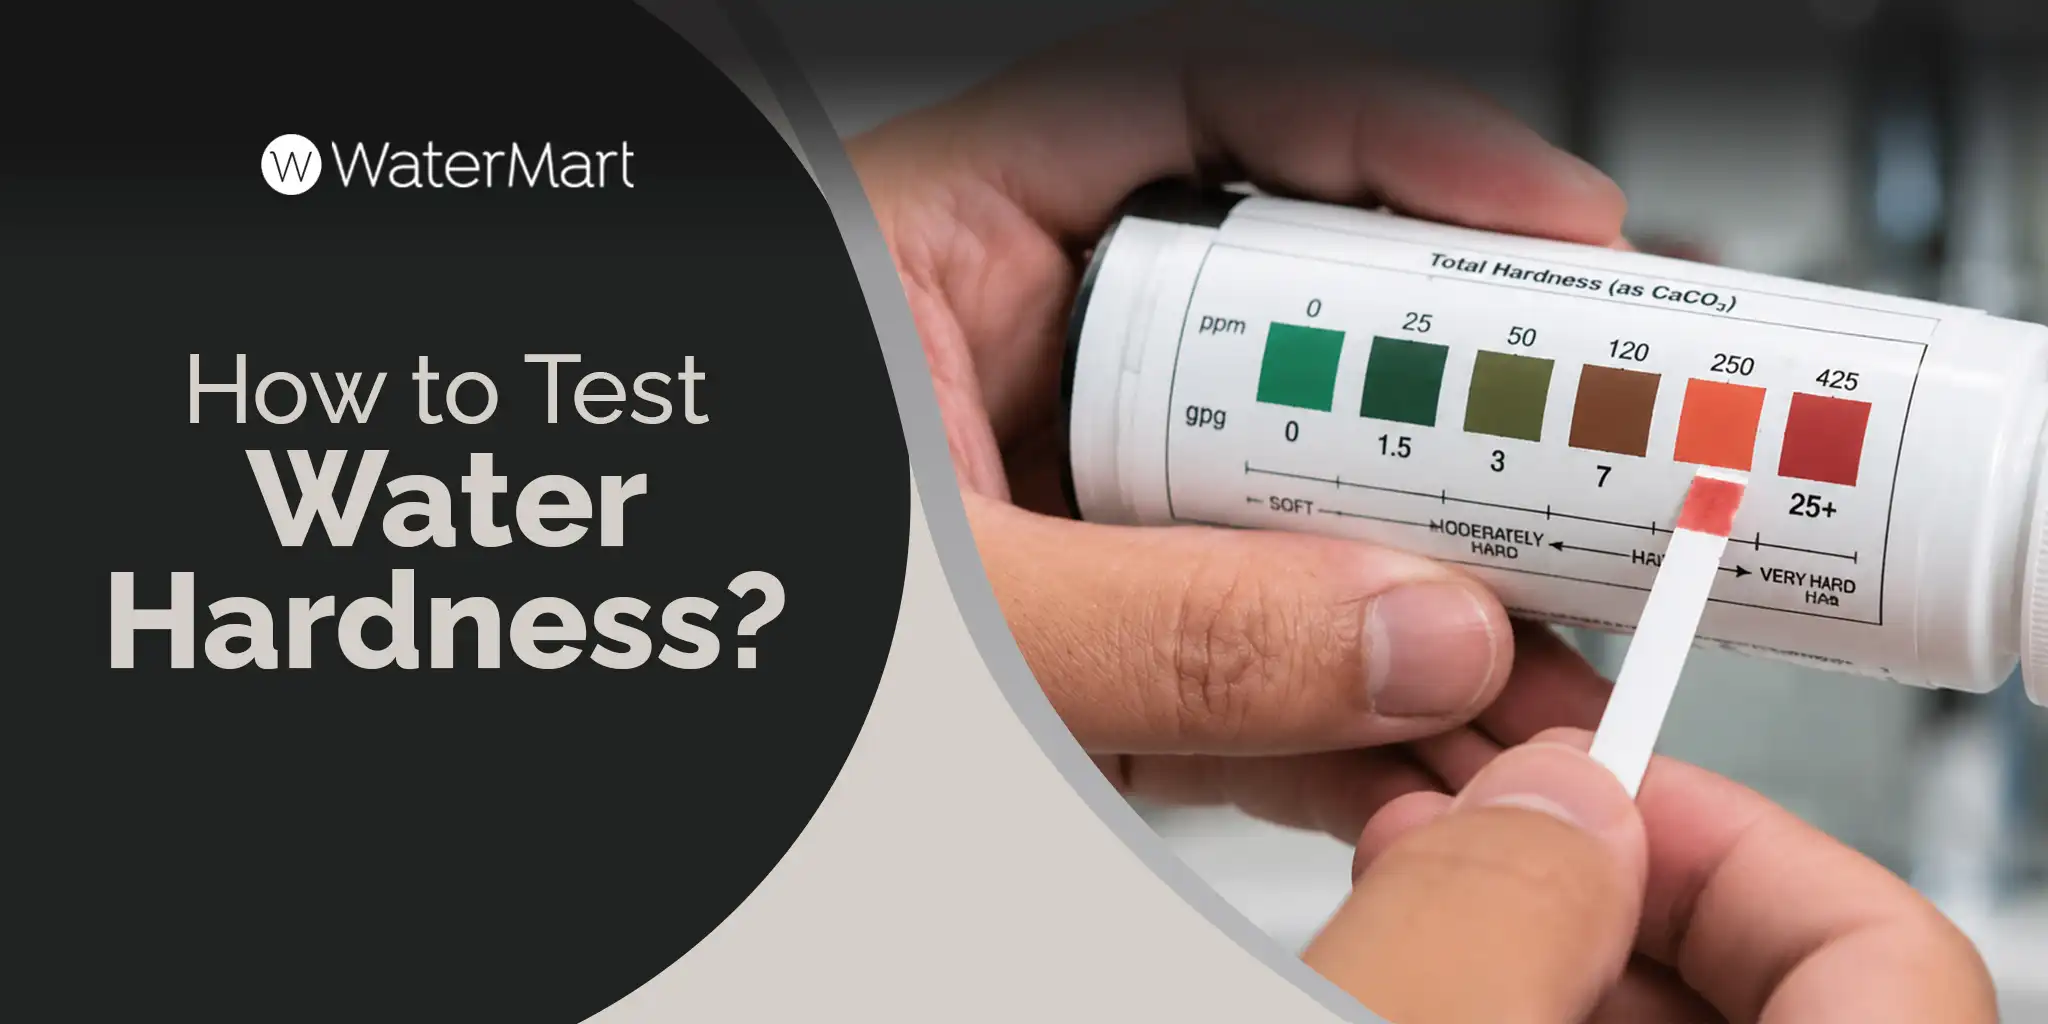
How to Test Water Hardness?
Many water hardness testing methods are available today, with some giving quick estimates while more advanced options provide accurate, precise mineral concentration readings. Your current water quality and budget will determine whether a complete water hardness analysis is required or a simple DIY test will suffice.
Ready to understand your water supply better? Here are 8 easy and dependable ways to test water hardness:
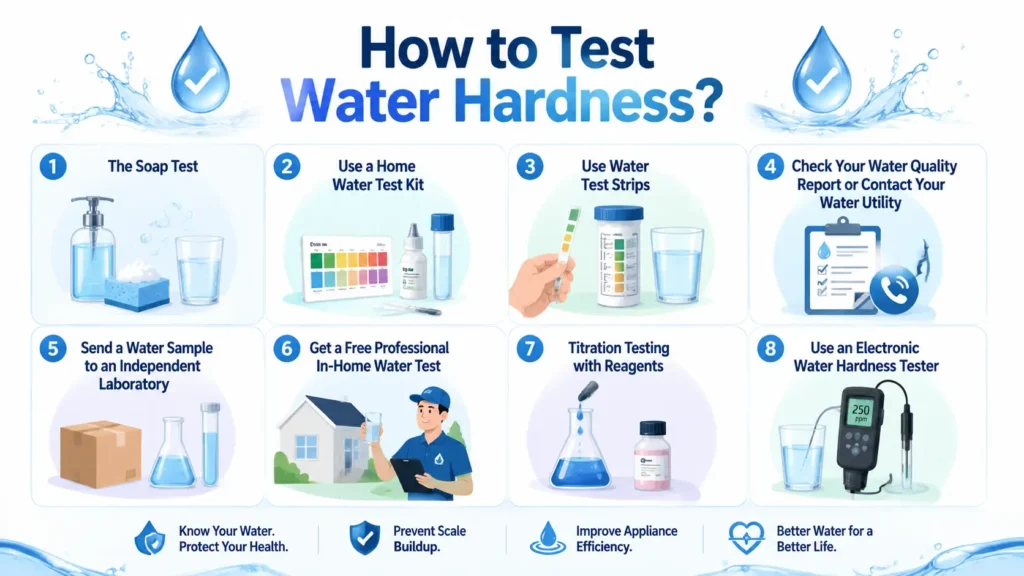
Method 1: The Soap Test
The soap test is an easy DIY water hardness test method, but it doesn’t give you exact measurements. However, it does give homeowners a quick indication of their water quality. If your water supply is even moderately hard, with calcium and magnesium concentrations as low as 60–120 mg/L , it reduces the effectiveness of soap and compromises lather formation.
Here’s how to conduct a DIY soap test:
- Fill one-third of a clean transparent jar or bottle with your usual tap water.
- Add some drops of liquid soap.
- Shake the jar for 10-15 seconds.
- Check the resulting foam and water appearance to determine overall water hardness.
The results of this method can be interpreted as follows:
- If the foam is thick and the water is clear, your water is soft
- If there are a few bubbles and the water is cloudy, the water is hard.
Method 2: Use a Home Water Test Kit
A home water hardness test kit is a popular and easy way for Canadian homeowners to test their water at home. Most of these kits have color charts, reagent solutions, and testing strips. We’ll be discussing reagent drops, testing strips, and digital meters in more detail further on, as they are sold separately too.
For now, here are the general steps to follow when using a home water hardness kit:
- Collect the water in a clean container that has no streaks, soap residue, or any contaminant that might compromise the test results.
- Turn on the tap and let the water run for 30-60 seconds before letting it collect in the container. This precaution further ensures that there are no contaminants in the sample.
- Read the instructions included in the kit and fill the container to the recommended level.
- Follow the kit’s specific instructions and carry out the test as directed.
The best water hardness test kit will show your water’s calcium and magnesium levels in a matter of minutes. It should also come with instructions for converting the results into standard measurements like gpg or ppm.
The lower-cost options aren’t always the most accurate, though, so take these home tests as a starting point rather than a fully reliable assessment of water hardness.
Here are some reasons why home water testing kits are so popular:
- They’re affordable.
- They’re easy to use.
- You get the results quickly.
- They’re suitable for both municipal and well water hardness tests.
- They’re easily available in both online stores and hardware stores.
Method 3: Use Water Test Strips
Water hardness test strips are another popular option, mainly because they are affordable and easy to use. They have chemical pads inside that react to the minerals in hard water. Here’s how to use them:
- Put some tap water into a cup and dip the strip inside according to the instructions.
- Wait around 1-2 seconds or according to the instructions.
- Remove the test strip and do not shake off the excess water unless specified in the instructions.
- Hold the test strip horizontally so that its colors don’t bleed into each other.
- Wait out the reaction time, which is usually 15-60 seconds.
- Compare the color results to the chart provided in the packaging.
- Most testing strips will give water hardness values in gpg or ppm.
The advantages of these testing strips include:
- Quick results.
- Easily portable.
- Easy and convenient to use anytime.
- Best for routine monitoring at home.
However, we should remember that these strips are less accurate than a lab analysis. The readings may also be compromised by different types of lighting and incorrect handling. If this is your first time using water hardness testing strips, watching a video beforehand is a good way to minimize slip-ups.
Method 4: Check Your Water Quality Report or Contact Your Water Utility
Some Canadian municipalities have annual water quality reports with information about the locality’s water hardness. Any homeowner asking “How hard is my water?” can easily get the answer if their municipality gets this report.
It’s best to interpret the individual ions (both calcium and magnesium) together as total hardness or CaCO₃ equivalent. These are the standard references for assessing water usability in households. For everyday use, here are the most useful comparison points to understand your water hardness rating and how it affects your soap usage and house:
- < 60 mg/L (soft water): great lathering and minimal scaling
- 60–120 mg/L (moderately hard): mild soap reduction
- 120–180 mg/L (hard): significant scaling and reduced soap efficiency/performance
- > 180–200 mg/L (very hard): strong adverse impact on household plumbing and appliances; treatment is often recommended in such cases
Water hardness may appear as calcium carbonate concentration, ppm (parts per million), mg/L (milligrams per litre), or gpg (grains per gallon). The table in the next section, “How to Measure Water Hardness”, also outlines the ranges of water hardness and the recommended course of action in each case.
Health Canada does not have a specific health guideline for hardness, but it does set an Aesthetic Objective (AO) of ≤ 200 mg/L. This means that while hard water is not a health risk, water above this level may cause noticeable problems in your home, like scale buildup or reduced soap lather.
Method 5: Send a Water Sample to an Independent Laboratory
Laboratory testing is among the most precise water hardness analysis methods you can use today. We especially recommend a well water hardness test since its mineral concentrations change according to season.
Here’s how to send a water sample for accurate lab testing:
- Contact a reputable lab and put in a request for an in-home water hardness test.
- The lab will give you some sampling instructions, which you have to follow accurately.
- Some labs might send over sterile sample bottles for the water samples, though others may ask you to use absolutely clean food-grade containers.
- Collect some cold water straight from a frequently used faucet, catching the water only after it’s been running for 30-60 seconds.
- If required, label the sample and mail it or drop it off at the lab within the specified timeframe.
- The lab will send you back a detailed report with all the values for hardness minerals, even if everything seems normal.
An accredited lab can give you results for:
- Calcium hardness tests
- Magnesium hardness tests
- Total dissolved solids
- Iron and manganese
- pH and alkalinity
- Other contaminants that bring down water quality such as nitrates, pesticides, chlorine, bacteria, and sulfur compounds.
When you go for a lab water hardness test, expect a comprehensive water quality analysis and accurate results. This is the most useful step in planning a proper water treatment system for your household.
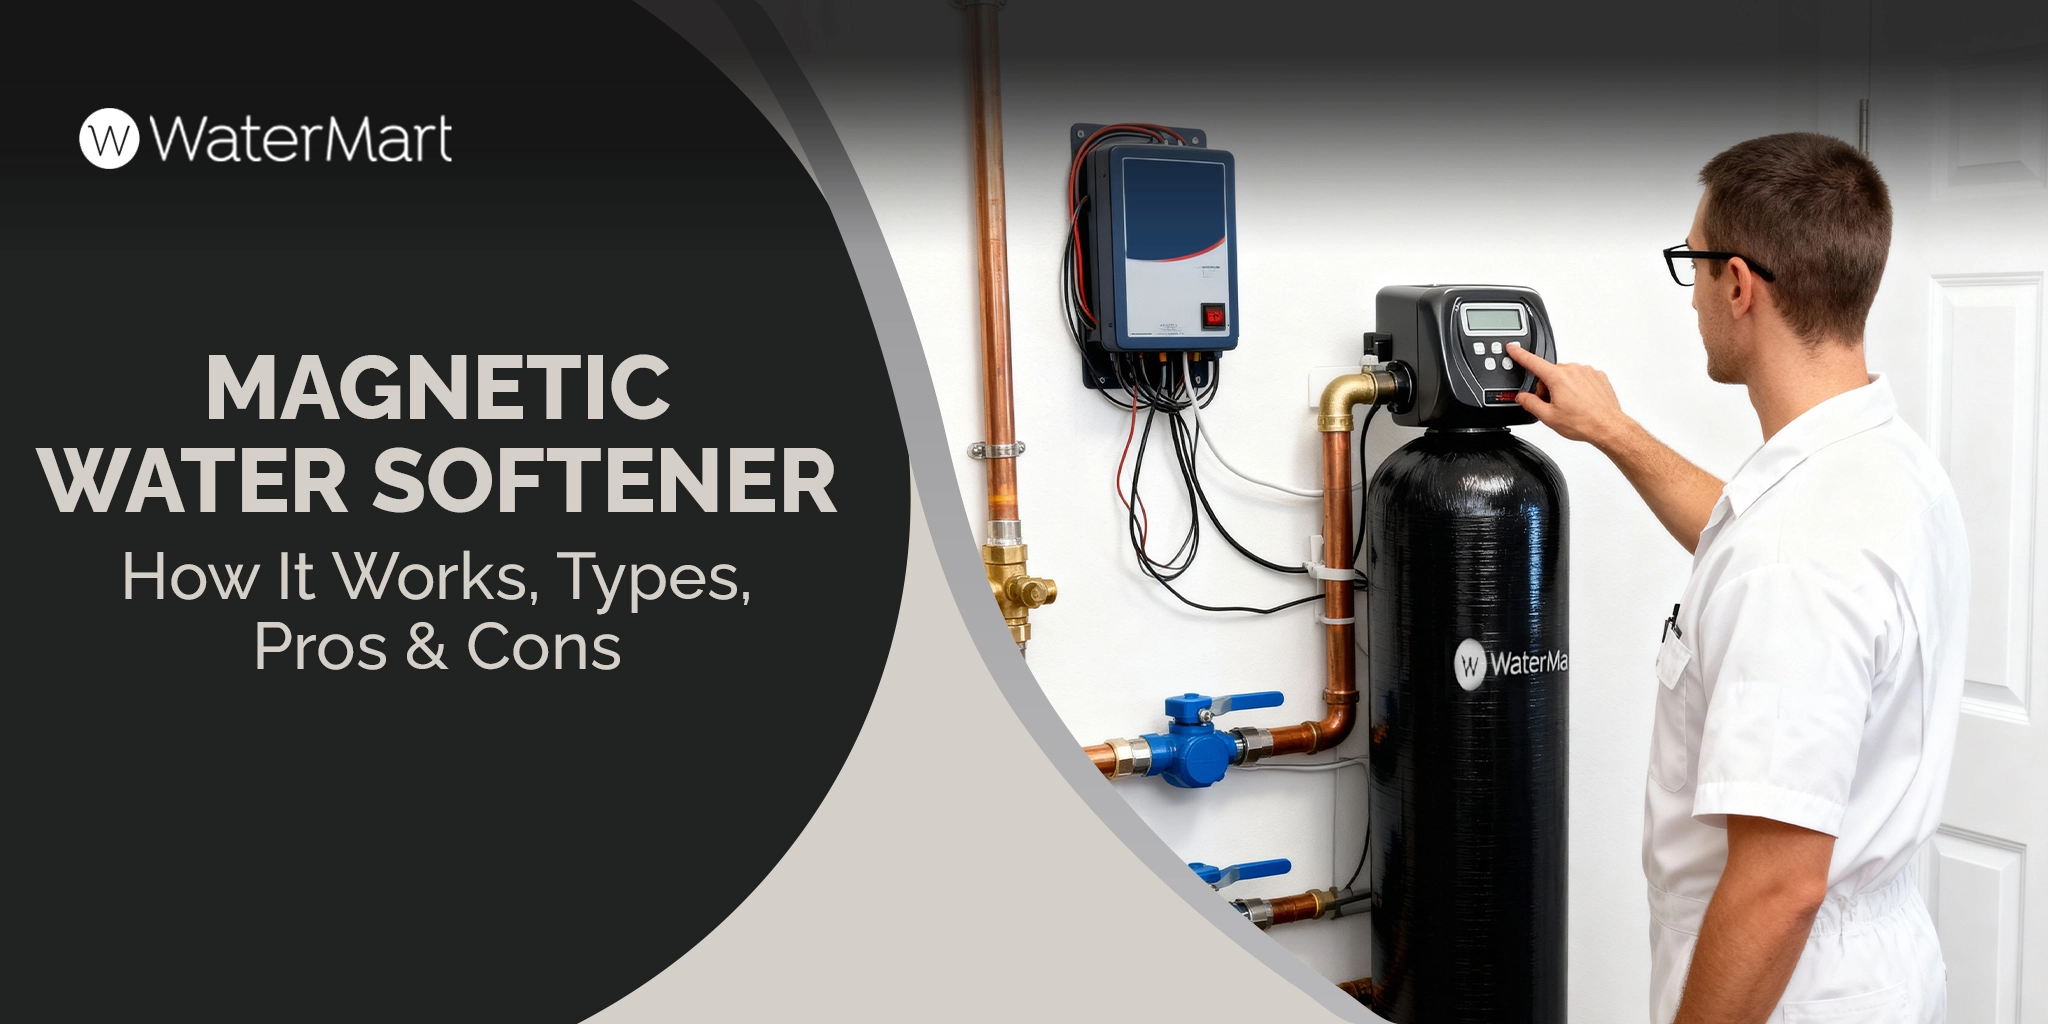
Method 6: Get a Free Professional In-Home Water Test
WaterMart is among the top water treatment companies in Canada that offer a free professional in-home water hardness test (including lab water testing as well).
When you book this water test, a trained technician will visit your house and conduct the following steps:
- Inquire about the most common hard water symptoms in the home, such as soap scum on sinks, dry skin, faded laundry, scale buildup on faucets, poor soap lathering, and compromised appliance efficiency.
- Inspect the water-using appliances and plumbing fixtures. The technician may visually check the faucets, showerheads, washing machines, dishwashers, and water heaters for mineral and scale buildup. Smaller appliances like kettles and coffee makers will also be checked for scaling, along with your current water softener or any other filtration system.
- Collect water samples from taps around the home, especially the kitchen tap and at least one bathroom faucet. If there’s a filtration system in place, they might get a water sample from both the treater and untreated water lines.
- Perform a water hardness test on-site, which may involve a digital hardness meter, test strips, or drop titration kits. These tests will show them the total hardness of the water in terms of mg/L or gpg along with the concentrations of calcium and magnesium.
- Check factors affecting water quality, including:
- Chlorine levels
- Iron and manganese
- pH and alkalinity
- Total dissolved solids (TDS)
- Scale potential
- Evaluate how water hardness is impacting the home. The technician will assess plumbing lifespan, soap performance, detergent effectiveness, appliance efficiency, and increased energy usage of scaled heating equipment.
- Recommend relevant treatment options: If the water hardness is very high, the technician may suggest water softeners and whole-home filtration systems. They may also recommend replacing some of the existing equipment or getting a scale removal system.
- Most technicians will also summarize and explain the results of the test, including the water hardness levels, what minerals are causing major issues, and the recommended steps for the future.
With this professional test, Canadian homeowners can determine whether they require a reverse osmosis (RO) system for clean drinking water, a water softener, or a whole-home filtration setup.
Method 7: Titration Testing with Reagents
Titration testing is an advanced water hardness testing method that also provides more accurate results. Basically, it’s a calcium hardness test that uses reagents to make a chemical reaction and measure mineral concentration.
Here’s how to conduct this method:
- Measuring a sample of the water in a testing container.
- Gradually add the chemical reagents and count the drops until the color changes.
- The final reading decides the level of water hardness.
Since this method is highly accurate and reliable for use in scientific and industrial settings, it’s considered the best way to test water hardness for use in commercial water hardness analyzers and professional treatment facilities.
Method 8: Use an Electronic Water Hardness Tester
An electronic water hardness tester or digital water hardness tester electronically measures mineral concentration. It measures dissolved mineral concentration or electrical conductivity in a water sample and gives you an accurate digital reading.
Here’s how to use these devices:
- Get a clean glass or other food-grade container and collect a cold water sample from the tap. As with lab testing, let the water run for 30-60 seconds before collection.
- Turn the tester on, calibrating it before the first use if required.
- Rinse the tester probe with distilled water if the manufacturer recommends it (to prevent contamination).
- Dip the probe into the water sample up to the indicator line. Don’t submerge the device unless you’re sure it’s completely waterproof.
- The device might take some seconds to stabilize, so wait until you get a reading.
- Interpret the reading by comparing it with the hardness reference ranges in Canada:
- 0–60 mg/L: soft water
- 60–120 mg/L: moderately hard
- 120–180 mg/L: hard
- Above 180 mg/L: very hard
- Clean the device and store it properly after use to maintain accuracy in the long term.
These devices are used in laboratories, homes, industrial systems, commercial facilities, and aquariums. They’re very convenient, reusable tools that give you fast and easy readings. A high-quality device is excellent for long-term monitoring in households with recurring water quality issues.
On the downside, though, a quality digital water hardness tester has a high upfront cost, which may not be suitable for everyone. Plus, certain models only estimate the total dissolved solids in a sample instead of accurately reporting the exact hardness level.
How to Measure Water Hardness Levels
A water hardness ppm chart can help you compare mineral concentrations and work your water hardness levels accordingly. In Canada, anything above 7 gpg (1 gpg equals approximately 17.1 ppm) is considered hard enough to start damaging plumbing systems and appliances over time.
The following table helps us look at all the hardness ranges and their effects at a glance:
| Level | Grains per Gallon | What to Expect | Status |
| Soft | 0–3 gpg | Minimal impact on fixtures and appliances | Low concern |
| Moderately Hard | 3–7 gpg | Early signs of spotting and some soap inefficiency | Worth monitoring |
| Hard | 7–14 gpg | Visible scale, dry skin, reduced appliance efficiency | Action recommended |
| Very Hard | 14+ gpg | Significant scale buildup; appliance lifespan reduced | Immediate action |
How To Treat Hard Water?
Once the water hardness test has confirmed your suspicions, you can treat hard water with either or a combination of these options, depending on the hardness levels: water softener, salt-free water conditioner, RO system, whole-house filter, vinegar solution, installing a shower head, and lowering the water’s temperature.
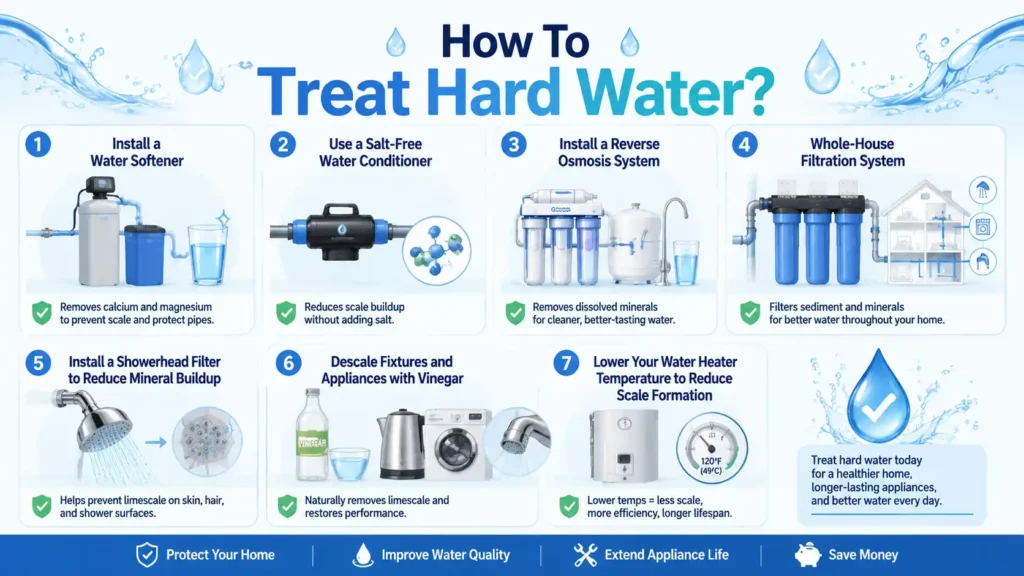
Install a Water Softener
A water softener uses ion exchange technology that replaces calcium and magnesium minerals from your water supply (by passing it through a resin bead tank) and replaces them with potassium or sodium ions.
Using a water softener reduces scale buildup, improves appliance efficiency, and results in softer laundry too. This solution is among the most effective and long-lasting options for water hardness.
Use a Salt-Free Water Conditioner
Installed on the main water line, salt-free conditioners treat hard water by altering the physical structure of hardness minerals through a process known as ‘Template Assisted Crystallization (TAC).’ Hardness minerals turn into harmless, tiny particles that stay in the water, but don’t adhere to surfaces or form limescale.
The conditioners aren’t very effective for extremely hard water, but they’re a low-maintenance and eco-friendly option.
Install a Reverse Osmosis System
Reverse osmosis (RO) systems are great for enhancing the overall drinking water quality. The RO process forces water through an advanced RO membrane (0.0001 micron size) that blocks up to 99% of contaminants, including dissolved solids, heavy metals, bacteria, and hardness minerals. Their microscopic pores allow water through, with the separated solids getting flushed out in the wastewater stream.
Since reverse osmosis removes a decent amount of hardness minerals, it enhances the taste of a home’s drinking water and reduces mineral residue in water-using appliances such as kettles, coffee makers, and ice machines. Keep in mind that RO systems are usually designed for drinking water, not for functioning as a whole-home system.
Whole-House Filtration System
A whole-house system treats water at the point of entry in a home. The setup utilizes multiple filtration media, including a sediment filter, activated carbon, water softening, and additional stages like RO, UV purification, and ion reduction to remove sediment, chlorine, iron, calcium, and magnesium that may otherwise cause appliance issues, scale buildup, and unsightly soap scum. Moreover, it delivers clean, soft water at every tap, shower, and appliance.
Install a Showerhead Filter to Reduce Mineral Buildup
Showerhead filters are attached between the shower pipe and showerhead to enhance shower water quality and make it softer. You can look at the filter type and then decide whether to utilize Kinetic Degradation Fluxion (KDF) media, vitamin-based cartridges, and carbon filtration.
Filter cartridges usually need replacing every few months, according to the model and water usage. This way, they can keep catching the unwanted minerals and contaminants in your water for the long term.
Showerhead filters directly reduce the mineral residue getting into your hair or on your skin. Certain models can also reduce chlorine exposure. They’re also a great option in rental properties, small homes, and apartments.
Descale Fixtures and Appliances with Vinegar
White vinegar is an inexpensive and effective way to routinely descale your showerheads, faucets, kettles, coffee makers, and other water-using appliances. This simple step can also enhance appliance lifespan and efficiency. The mild acetic acid in vinegar reacts with the calcium buildup and breaks it down.
Here’s how to utilize the vinegar descaling hack for various appliances:
- For coffee makers: Make a 1:1 solution of vinegar and water, then use it to run a brewing cycle without the coffee. If you’re worried about the taste getting into your coffee, flush out the system with plain water before regular use.
- For kettles: Fill half the kettle with a 1:1 vinegar-water solution and bring it to a boil. Turn off the kettle and leave the solution for 15-30 minutes, then rinse several times with plain water.
- For showerheads and faucets: Fill a plastic ziploc or regular bag with white vinegar and tie it around the fixture, making sure the scaled parts are submerged. Leave this setup overnight, then remove the bag and scrub the fixture with a brush, then rinse.
Lower Your Water Heater Temperature to Reduce Scale Formation
Hard water minerals separate from water more quickly in high temperatures. This phenomenon is why calcium and magnesium can settle thickly on the heating elements within water heaters.
Just lowering the water heater’s temperature a little (to around 49°C or 120°F) can slow down the mineral precipitation process and reduce mineral scale buildup. If your water is very hard, regularly flushing the water heater can also loosen the sediment and accumulate mineral deposits inside.
FAQ: How to Test Water Hardness
Does hard water affect your health?
Hard water is usually considered safe for drinking in normal circumstances according to Canada’s municipal standards. Magnesium and calcium are present in hard water: both are essential minerals that contribute positively to your diet.
If the hardness level is too high, however, the water can cause issues in your hair, skin, appliances, and plumbing systems. Households with elderly citizens, very young children, and members affected by medical conditions usually require clean and filtered drinking water.
How often should I test my water hardness?
A water test is recommended at least once a year. If you notice issues such as lower water quality, scale buildup on faucets, or compromised appliance performance, additional testing might be in order. More frequent tests are also recommended for properties with well water sources.
How can I test water hardness at home for free?
The soap test is a simple and easy way to test water hardness in your home. Put a few drops of liquid soap in a jar half-filled with water and close the lid. Give the jar a good shake and check the water’s appearance and the formation of lather. Hard water will react with soap and limit its ability to create bubbles or proper lather.
Another way is to check the municipal water quality reports for your region’s water hardness information.
What’s the difference between GPG and PPM?
GPG stands for grains per gallon, and PPM stands for parts per million. Both are accurate measurements for water hardness concentration.
- 1 gpg = around 17.1 ppm
- GPG is the more commonly used tool in water treatment systems
- PPM is a popular measurement tool mostly utilized in laboratory reports
What is a normal water hardness level?
Water between 0–3 gpg is generally considered soft. Levels above 7 gpg are considered hard and may require treatment depending on household conditions.
Which water hardness test method is the most accurate?
Laboratory testing and titration testing are usually deemed the more accurate testing methods for water hardness. There are also professional digital analyzers available now: these provide very reliable readings.
Take Action Against Hard Water
The best way to test water hardness depends on your current water situation and specific needs. If you’re just starting, a simple soap test is good to figure out if you have hard water in your home. From there, you can move to more advanced methods or a professional lab analysis. Identifying problematic mineral levels can help your appliances perform better, reduce maintenance costs, and enhance the whole household’s overall health.
Ready to enhance your home’s water quality? WaterMart has the most advanced water treatments in Canada for both homes and businesses.